Friday, October 31, 2014

Happy Halloween Freaky Friends!!!

 
Happy Halloween and thanks for stopping by!  Today over at Stylin' Stampin' INKspiration, we are celebrating Halloween!  Some design team members may have tricks and some may have treats!  May sure you stop by to visit each to see which they have!
 
Today my project is a treat!  I made these cute little twisted cards, perfect for sliding a gift card or some cash inside.  I have two boys who love I-Tunes for their music and games.  Therefore they each will be getting an I-Tunes gift card in their pocket with a burlap treat bag filled with some candy treats (courteous of My Paper Pumpkin September kit!)


Supplies Used
Cardstock ~ basic black, whisper white, Bermuda bay, tangerine tango
Ink ~ basic black, tangerine tango, Bermuda bay
Stamp set ~ freaky friends, ghoulish greetings
DSP ~ motley monsters
Misc. apothecary accents framelit set, crushed curry bakers twine, wiggle eyes (retired), decorative label punch

Thursday, October 30, 2014

Stocking Gift Card Holder with Merry Monday #132

Todays post is one totally for fun!  I mean not only am I using Stampin' Up! brand supplies, but I am playing around some fun retired products that I still love.  The project is for the challenge over at Merry Monday Christmas!  They really have some fun themed challenged, and like playing along when I get the chance.  This one, however, I couldn't pass up.

The other fun part, is that I challenged my good friend, Breelin Renwick at Craft-somnia Momma to play along with me.  Make sure you go visit her, to see what she created!

 
I have three favorite retired items that I am using.  Number 1 is the stocking big shot die.  Number 2 is the lattice embossing folder.  Number 3 is the festive flurry stamp set and matching framelit set.  My mother loves antique and vintage looking things, so this is perfect to slide her gift card in for one of her Christmas gifts.  Yes, I said gift card holder.  You see when you lift the stocking top up, there is a pocket that you can slide a gift card in.  My plan is to attach it like a tag to the outside of her other wrapped package.  I love everything about my stocking, but I real fun element, is the little mini punched stars that dangle on natural twine from the large snowflake cluster.

 
Inside showing where the gift card or cash can be slid inside.


I stamped the snowflake in baked brown sugar ink, and cut out a champagne glitter snowflake to layer in behind.  I also stamped the sentiment of "merry and bright" from the Good Greetings stamp set. 
 
 
Supplies Used
Cardstock ~ very vanilla, champagne glitter paper
Ink ~ baked brown sugar
DSP ~ typeset
Stamp set ~ good greetings, festive flurry (retired)
Misc. ~ stocking die (retired), snowflake framelit set, (retired), mini star punch, natural twine, very vintage buttons, lattice embossing folder (retired)
 
I hope you have enjoyed my challenge project.  Leave some "love" as I always enjoy reading your comments on my projects.

Tuesday, October 28, 2014

Lets learn some MAGIC over at SSINK

 
Good morning and thanks for joining me here at Ink a Doodle Creations.  You won't see much magic going on here, cause today I'm sharing my full project with tutorial over at Stylin' Stampin' INKspiration.  So click the link and hop on over to learn how to make a full size magic card and see the finished project!!!


Monday, October 27, 2014

Fall Fest with #HSS197

Good Monday morning!  Thanks for stopping by and visiting me here at Ink a Doodle Creations!  This weekend I was asked by my Mom to make her two "Happy Thanksgiving" cards.  One for my nephew who is out of the country serving in the Air Force and the other to his girlfriend, who is in basic training for the Navy.  So I went to town seeking out the perfect current challenges out there.  I came across this fun sketch challenge over at Hand Stamped Sentiments and decided to play along.  Here is what I came up with, hope you will enjoy.

 
Supplies Used
Cardstock ~ crumb cake, blackberry bliss, whisper white
Ink ~ blackberry bliss, soft suede, calypso coral, daffodil delight, old olive
Stamp set ~ fall fest, sentiment set from October My Paper Pumpkin kit
DSP ~ park lane
Misc. ~ crystal effects, blendabilities to color the dots, gold buttons, natural twine, fun fall framelit set

Sunday, October 26, 2014

Halloween Challenge CYCI#42

Thanks for joining me here today at Ink a Doodle Creations.  Today I am over at Can You Case It? and this weeks challenge is a Halloween one!  Did I say, I love Halloween?  Its such a fun holiday and its the one day I eat as much chocolate and candy as I want, and don't feel bad!!
 
 
This fun little spooky card was created using the inky block technique.  I also went with a different sized card.  I cut out my rectangle shapes, rounded the corners and inked up my blocks, spritzed with a little bit of water and stamped it on.  I used colors of tangerine tango, old olive and rich razzleberry.  Directions for this card are below.
 
 
On the inside, I inked up a layer and added a bat.
 
Directions:
card base is a 6-1/2" square.  I scored it at 3-1/4" and folded.
Inked layers measure: 1-3/4" x 2-1/4" with corners rounded.
 
Supplies Used
Cardstock ~ very vanilla, old olive
Ink ~ tangerine tango, old olive, rich razzleberry, basic black
Stamp set ~ freaky monsters, good greetings
Misc. ~ brights candy dots, black bakers twine
 

Wednesday, October 22, 2014

Nutty or Nice? Family Christmas Card Option #2 Contest!

Good morning and thanks for stopping by to visit me here at Ink a Doodle Creations!  Today I am sharing my #2 choice for my family Christmas card.  If you remember from last week when I posted my holiday card using the festival of trees stamp set, I usually design and put together a few choices for my families Christmas card.  Click HERE for choice #1. 

If you want to play along, here is how:  for 4 weeks I will post a Christmas card choice (#1 thru #4) here on my blog.  Comment on each post and on the final #4 card, I will have a voting panel set up on my facebook page for you to vote which is your favorite.  If my family (i.e. husband and two sons) picks the winning card that got the most votes, you will be entered in to WIN a Stampin' Up! surprise!!!

 
I am so in love with the cute Santa Stache stamp set.  I can't decide which is my favorite, the Santa or the Nutcracker!  One of the things I did differently, is I used a piece of champagne glitter paper to cut out the mustache for the nutcracker.  It adds just the right amount of glitz to this Christmas card.
 
Supplies Used
Cardstock ~ garden green, whisper white, real red
Ink ~ real red, garden green, soft sky, skin blendabilities set
Stamp set ~ santa stache
DSP ~ trim the tree dsp stack
Misc. ~ champagne glitter paper, gold sequin trim, stylish stripes embossing folder 


Monday, October 20, 2014

Princess Bella Layout Challenge #SSINKSS14

 
Good Monday morning!  Thanks for joining me here at Ink a Doodle Creations!  I hope everyone had a wonderful weekend.  Today over at Stylin' Stampin' INKspiration we are ready to share or layout for this months Layout Challenge!
 
 
Here's the layout you can play along with.  Don't forget to link it up at our main blog or even on our Facebook group if you don't have a blog.  Link it with our special #SSINKSS14 hashtag to enter.

 
Last month we adopted a new family puppy!  Bella is such a princess and she knows it!  Loopma our yellow lab was a little snooty at first, but now loves to run and play ball with her.  So what better time to show off her cute puppyness with this months challenge layout.
 
Supplies Used
My Digital Studios software
Paw Parade Kit ~ DSP, embellishments and brush set
Colors ~ baked brown sugar, whisper white, island indigo, primrose petals and summer starfruit
 
Now that you've seen my take on this month layout, I hope you will go create and join us.  But first, leave some "love" and go see what the other design team members have created.


Sunday, October 19, 2014

CYCI#41 Clean and Quick Challenge

Good morning!  Thanks for joining me here at Ink a Doodle Creations.  Today is an exciting day for me.  Today I am sharing my first project card over at Can You Case It? as a new Design Team Member!!!  WHOOP WHOOP!!!  I hope you will enjoy my card for our Clean and Quick Challenge.  You should totally come play along with us!

 
 So here is the challenge...
http://canyoucaseit.com/
 
and here is what I created...
 
 
I love Fall and all the beautiful colors it brings to us here who get to live in Virginia.  Its one of the reasons I really love the color me autumn DSP.  There is no thinking to use it and it contains all the wonderful fall colors that I get to enjoy right now.
 
I added a simple layer with whisper white and used my chalk talk framelit set to highlight my sentiment.  I added a few simple candy dots along with the natural chevron ribbon.
 
Supplies Used
Cardstock ~ Cajun craze, whisper white, mossy meadow
Ink ~ Cajun craze, soft suede
Stamp set ~ for all things
DSP ~ color me autumn
Misc. ~ chalk talk framelit set, regal and neutral candy dots, natural chevron ribbon
 
Don't forget to leave some "love" and head on over to the main Can You Case It? blog to see all the other wonderful project cards from our designers.


Friday, October 17, 2014

Let's Get Spooky with #PCCCS114

Good morning and thanks for joining me here at Ink a Doodle Creations!  I am officially in the mood for Halloween.  I decorated the house Wednesday night and I just need candy!!! TRICK OR TREAT!!!

Today I am sharing my project card for the challenge over at Paper Craft Crew.  The sketch was perfect for my idea of ghosts and goblins and even Halloween needs a little sparkle!!

 
Supplies Used
Cardstock ~ basic black, whisper white, Bermuda bay
Ink ~ sahara sand, Bermuda bay
Stamp sets ~ fall fest, ghoulish greetings
DSP ~ motley monsters
Misc. ~ on film framelit set, silver glitter paper, tangerine tango two tone twine, banner punch, neutral candy dots, star framelit set, itty bitty accents punch set (the star)
 
Again, thanks for stopping by.  Leave some "love" as I always enjoy reading your kind comments.  Don't forget to stop back by next week to see my 2nd Family Christmas card idea choice!

Thursday, October 16, 2014

Festival of Trees Prototype #1 Family Christmas Card

 
Good morning and thanks for joining me here at Ink a Doodle Creations.  Today I am over at Stylin' Stampin' INKspiration and we are sharing some early Christmas cards.  Now's about the time I start thinking about how I want our family Christmas card to look.  I usually make up about 3-4 prototypes and lay them out in front of the family and let them decide. Well.....I let them give their opinion, then I decide!!!!!  Well, I am the MOM, it has to count for something!  This is the 1st of four prototypes I will have for them.  This card is a little detailed, but keep in mind that I only hand make about 10-12 handmade cards.  They go to those who I know appreciate my cards, but also the time I have put into them.  All others....well they get really simple cards.

 
One of my favorite stamp sets from the new Stampin' Up! Holiday Mini catalog is the Festival of Trees set.  Not only do I love that its a photopolymer stamp set (easy for stamping and layering the decorations), but it also has a coordinating punch to cut the trees out.  I love things that coordinate together to make my life run smoother.  One, well, two of the cute factors of this card for me, is the silver sequins and the cute little banner cluster at the top left corner.  Its just something about banners that make a card...just....cute!!

 
I punched out two solid trees in smoky slate and lost lagoon and then stamped one from the set in pear pizzazz and added a few basic rhinestones to the dots.

 
On the inside, I added some all is calm washi tape and added a couple more trees.
 
Supplies Used
Cardstock ~ whisper white, lost lagoon, pear pizzazz
DSP ~ all is calm
Ink ~ lost lagoon, pear pizzazz
Stamp set ~ festival of trees
Misc. ~ all is calm washi tape, frosted sequins, tree punch, on point embossing folder, banner punch
 
I hope you have enjoyed my first prototype Christmas card and you want to participate in a fun contest (read below for the details).  Come back and keep your eye out for the second prototype card I will post next week.  After all four prototypes have been posted, I will have a contest and there will be a prize!!  Leave some "love" and go visit our main blog to see some more great ideas for Christmas cards, you might get INKspired!!!
 
If you want to play along, here is how:  for 4 weeks I will post a Christmas card choice (#1 thru #4) here on my blog.  Comment on each post and on the final #4 card, I will have a voting panel set up on my facebook page for you to vote which is your favorite.  If my family (i.e. husband and two sons) picks the winning card that got the most votes, you will be entered in to WIN a Stampin' Up! surprise!!!
 

Tuesday, October 14, 2014

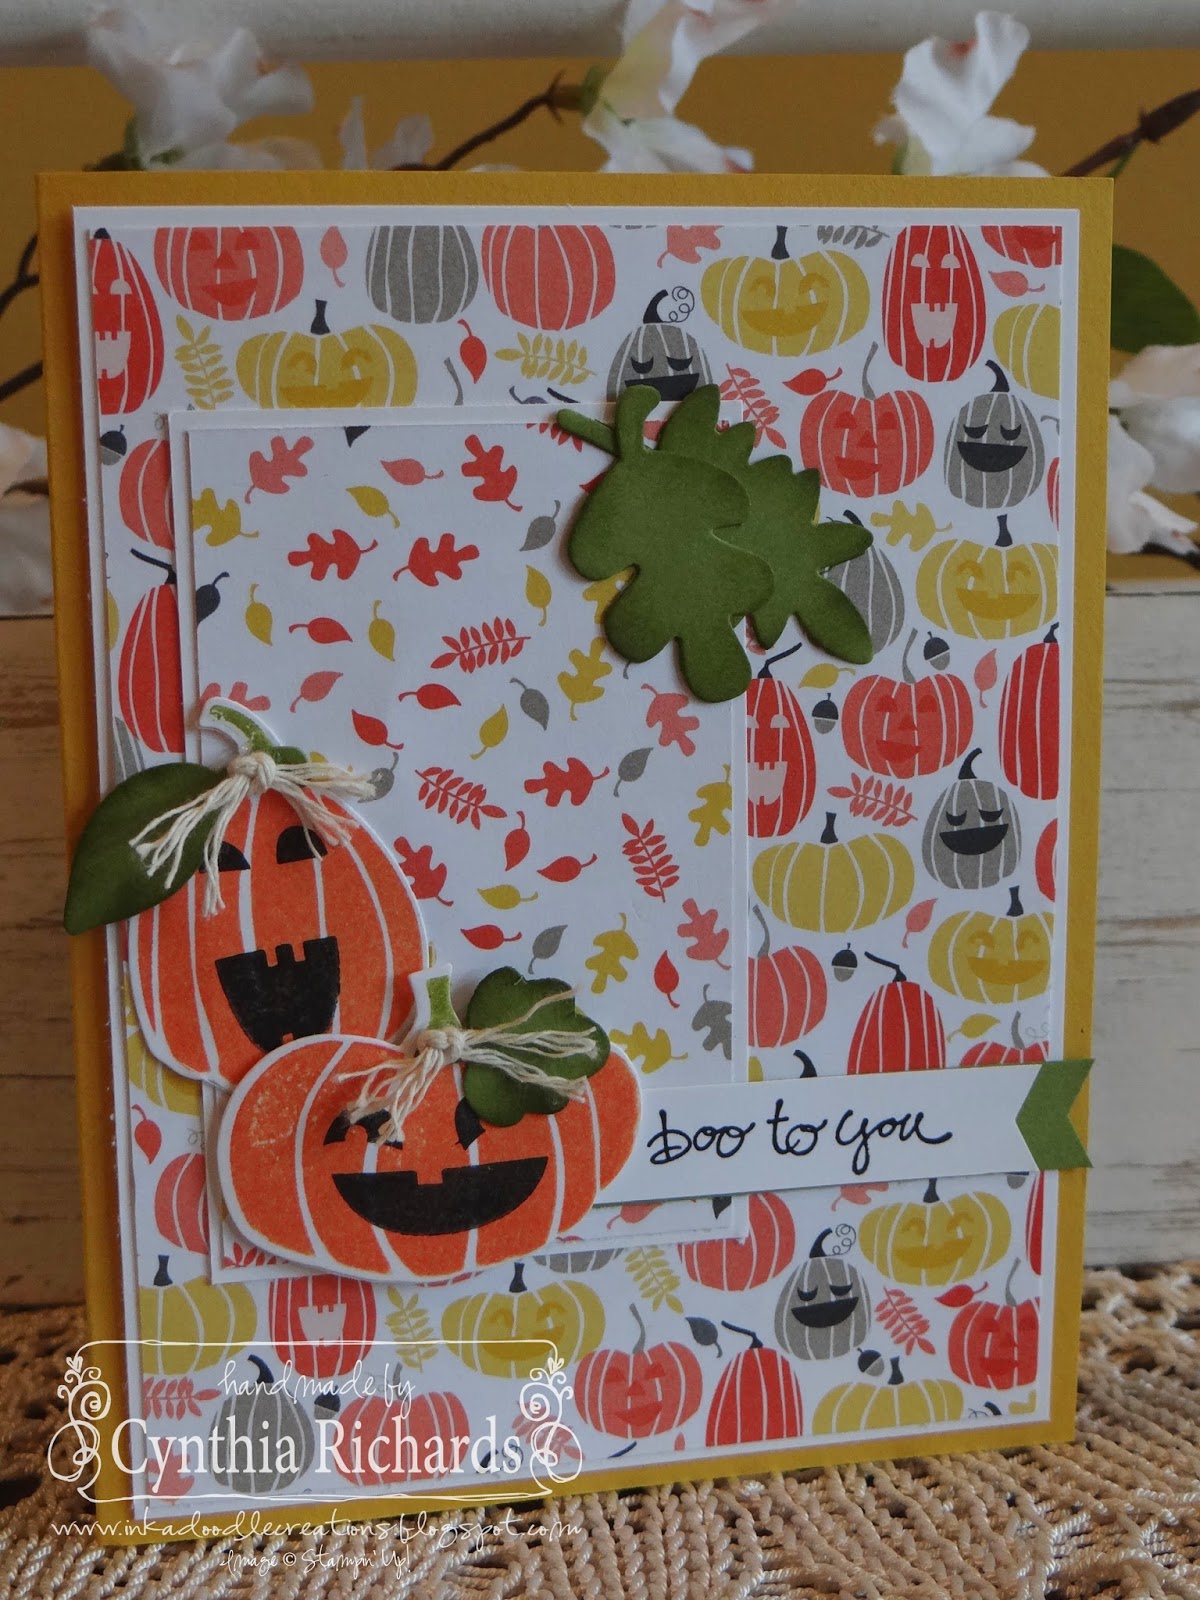
Boo To You! PCCCS#113

Good evenings and thanks for stopping by here at Ink a Doodle Creations.  After getting in a quick two mile run during my kids nap time, I had some time to get in a little fun stamping stamp!  I wanted to play along with the fun sketch over at The Paper Craft Crew, but boy am I cutting it close.  Its due this evening!  YIKES!!!

I thought this sketch was perfect for some little pumpkins using the Fall Fest stamp set and the Motley Monsters DSP.  Perfect together I think, don't you?!

 
I love how the shredded twine just finishes these little pumpkins quite nicely!  And the "Boo to you" sentiment, well its perfect as well as all the other many quick sentiments you get from the Good Greetings stamp set.  Yours FREE when you host at least a $300 show or place your own order!!!
 
Paper Craft Crew Card Sketch #113
 
Supplies Used
 Cardstock ~ crushed curry and whisper white, old olive
Ink ~ tangerine tango, basic black, old olive
DSP ~ motley monsters
Stamp set ~ fall fest, good greetings
Misc. ~ old olive two tone twine, fun fall framelit set (its a bundle with the fall fest stamp set and you can save 15% off when you purchase the bundle!), banner punch

Monday, October 13, 2014

Thankful for You October Card Sketch with #SSINKCS14

 
Good Monday morning!  Thanks for joining me here at Ink a Doodle Creations.  Today I am sharing my design team project for our monthly card sketch challenge over at Stylin' Stampin' INKspiration.  I hope you will get INKspired and come join in the fun with us.  We love seeing other crafters play along with our monthly challenges!  Some times we even have prizes!!!

 
Here is the sketch......

 
And here is what I came up with.  I kept the layers simple with Cajun craze as my base and layered with a woodgrain embossed whisper white on top of that torn and rolled at an angle.  I love using washi tape every chance I can get and was happy that I got to use our new fall colored washi tape from the holiday mini catalog.  I used some crystal affects and created some circles on my silicone mat, let them dry, then inked them up with some gold encore ink. 

 
I changed sides, but layered like I did on the outside with some torn washi tape in the lower corner.
 
Supplies Used
Cardstock ~ Cajun craze, whisper white, blackberry bliss
Ink ~ gold encore, blackberry bliss
Stamp set ~ merry everything 
DSP ~ color me autumn
Misc. ~ color me autumn washi tape, gold basic metal buttons, gold bakers twine, crystal affects, chalk talk framelit set

Thursday, October 9, 2014

Pumpkins! Pumpkins! Pumpkins! SSINK October BLOG HOP

 
Good morning, happy Thursday!  Thanks for stopping by to visit me here at Ink a Doodle Creations.  Today over at Stylin' Stampin' INKspiration, we are having our October BLOG HOP and we are sharing all things "Pumpkins"!!!  I don't know about you, but I love everything pumpkin related, edible or not!...buttttt I do prefer edible!!
 
As you hop along, please be sure to comment and show some love on every blog! We are always excited to hear from our followers! You should have just left stop number #1 on the Stylin' Stampin' INKspiration Blog Hop -Jennifer at Happy 2 Scrap 4 Life . If so, you are in the right spot. If a link doesn't work or you get off track, you will find the full blog hop lineup below.
 
 
So my special pumpkin project is this little basket that I traced from a template and decorated to turn into a pumpkin complete with a stem and leaves.  This little basket is cute and petite, but will hold a lovely sized treat! 

 
This cute little pumpkin basket is filled with caramel candy corn.  Perfect little treat!

 
The topper is three leaves from the Autumn Accents big shot die.  I embossed them using the wood grain folder.  The stem is a rolled up piece of burlap ribbon.  I tied on a wooden accent leaf with baked brown sugar thick twine for the bow and its what also ties it onto the treat bag.
 

http://stampinfunwithdiana.blogspot.com/2014/10/stylin-stampin-inkspiration-october.html
 
I hope you have enjoyed my cute little pumpkin basket.  Head on over to stop #3 Diana at Stampin' Fun with Diana.  I just know you are gonna love what she created!
 
Blog Hop Participant List:
  1. Jennifer at Happy 2 Scrap 4 Life
  2. Cynthia at Ink-A-Doodle Creations  --------->You are HERE!
  3. Diana at Stampin' Fun with Diana
  4. Donna at Organized Chaos
  5. Darcy at Dj's Stampin' Place
  6. Erica at Stamping Starlette
  7. Tonya at Stamp with Tonya
  8. Bree at Craft-Somnia Momma
  9. Kim at Stamping with Kim

Friday, October 3, 2014

Halloween Envelope Punch Board Treat Bag with Tutorial!

 
Good morning, its Friday, Friday, Friday!  Yesterday I sharing my Halloween card created using the Bootiful Occasions stamp set.  Today over at Stylin' Stampin' INKspiration, I am sharing this cute little candy box I made using the envelope punch board and some simple scoring.

 
I love being able to create my own little candy treat holders.  I love even better when I can use tools that I already own to make it easier.  That's where the handy dandy envelope punch board comes in hand.  With some simple score lines to get the box, I added a couple quick punches with the board to make it easier to close up.  Plus its just cute and who doesn't love ca-ute!!  The tag is created using the new note tag punch, freaky friends stamp set and a couple cute banners, then tied on using the new tangerine tango two tone rope twine.

 
Even though this is a small treat holder, don't under  estimate how much candy you can fit inside.  This little treat bag is perfect for simple teacher favors, to give to your child's school friends or co-works.  Whats even better, is that it doesn't take much paper and its a great way to use up that DSP stash.  YES, we know you have one!!!
 
Would you like to create your own now?  Follow these simple instructions and get started.
Above supplies you will need. Use choice of cardstock or DSP and cut to 8-1/2" x 5"

Score one the long side at 1/2", 2", 4-1/2", 6"

score on the short size at 1"

cut the tabs along the bottom up to the 1" score line and remove the smallest tab on the right.  these tabs folded up create the bottom of the box.

fold the 1/2" tab over and line up at the 1" line using the envelope board and then punch.

fold the paper on the next score line and once again line up with the 1" line and punch. 

you will fold on each line and punch until your paper looks like the above picture.

I would suggest using either redline or fast fuse adhesive to hold your box together depending on what kind of candy or item you would like to place inside.  place adhesive along the 1/2" tab as shown.

flip cardstock over and place another piece of adhesive along the third tab to close the box bottom together once folded in.

once you have folded up box this is what you end up with.  If you wish to stamp on the box, I would do so before closing it up.
 
 
Supplies Used
Cardstock ~ basic black, whisper white
Ink ~ Bermuda bay, basic black, tangerine tango, crushed curry (markers)
Stamp sets ~ freaky friends, ghoulish greetings
DSP ~  motley monsters
Misc. ~ note tag punch, tangerine tango two tone rope twine, Bermuda bay bakers twine, basic rhinestones, banner punch