Showing posts with label Teacher Appreciation Gift. Show all posts

Monday, December 22, 2014

Merry Cookie Monday!!!

 
Good Monday!  The days are getting closer and closer to the BIG day!  Yes, I know its almost time for everyone to place their orders with the all new Stampin' Up! Spring Mini Occasions Catalog, but I'm talking about Christmas Day!  Lets just hope that Santa thinks I've been a good girl this year and brings me some new stamping toys!! 
 
Today at Stylin' Stampin' INKspiration its our Merry Monday post and we are sharing everything Merry!  I want to share the cute little paper gift bags I put together using the Under the Tree Tag a Bag Accessory Kit from Stampin' Up!. 

 
I live in a small neighborhood of just 11 houses and needed something quick and easy to put their cookies inside for a little Christmas treat.  I purchased a pack of #10 exactly Petite Café Gift bags and the accessory kit to create these fun bags.  The kit is perfect cause of course it comes with everything you need to complete the bags as shown in my picture.  You two different styled tags in 5 different colors (I only have 4 shown in the above picture), bakers twine, colored mini clothespins and other tags great for stamping a holiday sentiment on.  I was able to place 8 normal sized baked cookies inside but really it could hold another 2.
 
Supplies Used
Under the Tree Tag a Bag Accessory Kit
and
Petite Café Gift Bags
 
Thanks for stopping by to visit my blog today.  I hope you have enjoyed my paper treat bags.  Don't forget to leave some "love" and head on over for the other designers to INKspire you with their Merry creations!


Friday, November 7, 2014

Autumn Washi Tape Leaves with a Thank You Treat for SSINK

 
Good morning!  Time for another fun project for over at Stylin' Stampin' INKspiration.  Today we sharing projects created with Washi Tape. Oh yea, I said it, washi tape!  Don't you just love this stuff?!  Its a staple in my craftroom and it sits front and center on my work countertop.

 
I created both these items using the color me autumn washi tape from the Holiday Mini Catalog.  Both items are for my sons favorite teacher he had last year as a special Thank You gift.   This year, she picked him to be his student helper for one of his class periods.  I think she kinda likes him!! 

 
She loves chocolate chip cookies, (of course so do I!!) so I plan to bake some and place them in the bag. (I'm sure I'll a have a few that just won't fit no matter how hard I try...Oh, what will I do with them?!?!?)

 
Up close of the leaves.  They were so fun and super easy to make.  I cut a piece of very vanilla to fit the size of each leaf I wanted to cut from the Autumn Accents Die.  Then I layered on washi tape until it was completely covered.  Once covered, I layed the piece on top of the die and ran it threw my Big Shot (WOW!!.... that was a close call....I hit the "i" instead of the "o" in the word "shot"!!  That could of been a real funny blooper post!!!  I just love the extra sparkle with the champagne glitter acorn on the bag and the leaf on the card.

 
 I'll have Andrew write a special note inside the card just for her, to make it even more special.
 
Supplies Used
Cardstock ~ very vanilla
Ink ~ blackberry bliss
Stamp set ~ many thanks
Misc. ~ color me washi tape, gold bakers twine, champagne glitter paper, autumn accents big shot die, wooden clothes pins, chevron paper bags
 
I hope you have enjoyed both my projects today using one of my favorite sets of washi tape.  Leave some "love" and head on over to our main blog to see what the others have created!

Tuesday, July 29, 2014

Note Card Gift Box with Tutorial at SSInk

 
Good morning and thanks for joining me here at Ink a Doodle Creations!  Today is my individual post over at Stylin' Stampin' INKspiration.  This stop is just a sneak peek.  To get the whole scoop on how I made this cute little note card gift box, you'll need to click the link above to view my tutorial.  I even have a new fun set to show ya over there.  So what are you waiting on.....get to clickn'!!!!


Thursday, July 24, 2014

A Little Christmas in July with SSInk

 
Good morning and thanks for joining me.  Today I am over at Stylin' Stampin' INKspiration and we are sharing a little Christmas in July.  I know some of you may think its way to soon to think about Christmas, right?  I agree as far as shopping and decorating goes, but if you send out a lot of holiday cards and make handmade paper gifts, then now is the time to start thinking about what type of cards, projects you want to send out and make for gifts.  Don't forget to head over to our main blog today, and see what all of our design team members have created.  We hope that we INKspire you to go create!
 
So for my project today, I want to share with you a thank you note card gift set I made.  I made two very quickly and these will be teacher gifts for my youngest son for Christmas.  Teachers get lots of special gifts and this would be a nice set of note cards for her to use to send out in appreciation of those gifts.  I say two gift sets, but you will only see this set today.  The other set with a step by step tutorial will be on our main blog, Stylin' Stampin' INKspiration, Tueday, July 29th.  Don't forget to stop by for full instructions and see the other special gift set!

 
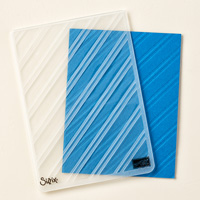
I used the Joyful Christmas stamp set to stamp each note card and an extra one, which I cut out to place on the outside of my box.  I colored them with my cherry cobbler blendabilities.  I think they turned out beautifully!  To create the horizontal stripped belly band wrap for the box, I inked up my stylish stripes embossing folder and ran it thru my big shot.  I also stamped a simple Thank You sentiment from the Petite Pairs stamp set for each note card and for the banner tag on the box.  Now what teacher or friend, wouldn't love a personal gift like this.

 
This stamp set is still available for purchase but only until August 27th, 2014.  So if you want it, I wouldn't wait to the last minute to get your hands on it.  Click any item in the supplies list below to head over to my online order site where you can place your order and have it delivered right to your door step! 
I hope you have enjoyed my project for our Christmas in July post.  Don't forget to leave some "love", and head over to our main blog to see the other design team members projects.  Come back on the 29th to see just how I made this cute little gift set and see my other version!!

Friday, May 16, 2014

Apples & Hugs Teacher Appreciation Gift Idea!

 
Good Friday morning!  Thanks for joining Stylin' Stampin' INKspiration!  Today we are sharing projects for "teacher appreciation".  These gifts could be great gift ideas through out the whole year and not just during a special week.  Its important to show how much we appreciate our children's teachers, even if it is with a cute box with candy, or just a special note that says so!
 
Todays project is just that.... a cute box with candy inside, and not just any box and any old candy.  Today I am sharing a sneak peek to one of the items in the new catalog.  Stampin' Up! has come up with a super cute little hamburger box and lets just say, the fun doesn't stop here, cause what's a hamburger without _ _ i _ _!?!  No you didn't?!  Yes, I did...I just teased you as to another new item that's in the catalog!!

So one of the first things that comes to mind when I think of teachers is "apples".  Well you don't think I would just give her an apple do you?!  NO, I'm giving an apple that will last forever, its cute and it holds a survival item.....CANDY!!  Yes, all teachers need a little of this to help get through the day.  Well that and lots of Coffee, my personal favorite!!

I created a cute little brown 3-D apple stem and inserted it thru a small hole I cut out in the top of the box lid.  When I created the stem, I created flaps that attach to the inside of the box lid.  I covered this with a punched out matching cherry cobbler circle.  Then green leaf is from the retiring framelit set, Secret Garden.  I tied a bow in the black chevron ribbon and slid it on my stem.  Now to the tag.  The tag shape also comes from this awesome die too.  I cut out one in very vanilla and one in gumball green.  Now to my mishap, yes everyone has mishaps and no one is perfect.  I first typed up my little teacher verse and printed it, cut it out with the die and posted it on Facebook for a few friends to see it ahead of time.  Well, luckily one friend pointed out that I had a typo, who me?!  Yes, me, I'm the typo queen!  I had typed the word "along" instead of "alone". And of course everything had been glued down and I was not about to undo everything and start all over, so I had a back up plan.  I retyped it, (with correct word this time), printed it and cut it out in a simple rectangle shape.  I attached two cute little red banners and attached to the underside and covered my bloop!!  Just like that, it was fixed and still looks great!


The inside of the box is filled with Hugs Hershey Kisses!  If you look at the tag below, you will see why I chose this particular type of candy!
The tag reads, "Teachers cannot survive on apples alone...they need "hugs" too!

Now what teacher wouldn't just melt when their student handed them this?!


Supplies Used
Cardstock ~ cherry cobbler, very vanilla, gumball green, early espresso
Ribbon ~ black chevron ribbon
Dies ~ new hamburger box die
Misc. ~ neutral candy dots, secret garden framelits
 
Thanks for stopping by.  I promise that while in the making of this box, no one got hurt, although I can't promise that not one, two or even maybe three Hershey Kisses didn't get lost along the way.   Ok, Ok, yes, I ate them!  Don't forget to leave some "love" and head over to our main Stylin' Stampin' INKspiration page and see what the other design team members have created! 

Tuesday, December 17, 2013

Winter Frost Teacher Treat Collection!

Andrew (my youngest-5th grade) has 4 teachers this year.  With 4 teachers it doesn't make it easy on the wallet to go buy gifts for each one, so I have made 4 small gift collections for each one. This is my 2nd gift collection.  I still have two more to finish by their day on Friday!! 


 This is the card that my son will write his own holiday message inside for his teacher!
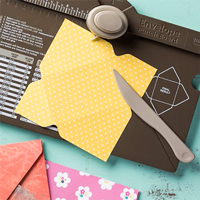
 This is a box made using the envelope punch board (of course!) and it has 4 decorated "thank you" note cards with envelopes inside.

Now you know how I am about recycling everyday items around the house...well here is another!  Can you guess what it is?!?!?!

Nope...I buy the small boxes of Walmart brand block cheese (kinda like Velveeta)  I always keep the cardboard boxes.  I used a clear window sheet and cut it down to size just perfect to wrap around the box.  It can slide off.  I decorated it using my favorite Winter Frost DSP pack and filled it with Hershey mini's (cause what teacher doesn't enjoy some chocolate!!!)

Supplies Used:
DSP:  Winter Frost
Stamps:  Festive Flurry, Oh, Goodie, Christmas Messages
Cardstock:  whisper white, island indigo, pool party, smokey slate
Ink:  pool party, island indigo
Misc.:  candy stripes folder, basic jewels, silver 1/8" ribbon, envelope punch board, circle framelit set


Thursday, December 12, 2013

December Stylin' Stampin' Squad Blog Hop - Quick Holiday Gifts


Thank you so much for joining us for the December Stylin' Stampin' Squad Blog Hop! This month our projects focus on quick and easy gift ideas for the holidays. As we enter the month of December, we find that the Christmas holidays are fast approaching. From decorating our homes, to holiday baking, we realize that shopping days are running low. Thats why we want to share quick and easy gift ideas that anyone can create in time for that special someone!

As you hop along, you will see that many of our design team members are giving away some great blog candy this month.   Leave a comment for each project and you will be entered in to win automatically!  Winners will be drawn Monday, December 16th, so don't forget to leave us those comments! (check out my special blog candy at the end of this post!)

You should have just left stop number 3 on the Stylin’ Stampin’ Squad blog hop – Annie L. of Love Me Cards.  If so, you are in the right spot. If a link doesn’t work or you get off track, you will find the full blog hop lineup below.

With my son having four teachers this year, it makes it a little tricky to buy for all of them and not cost me an arm and a leg.  So my thought was this: what teacher does not need a little chocolate boost through out the day and what teacher does not need "Thank You" cards, so here is what I have come up with as a quick and easy gift collections using things that can be found around the house.

I am one that never throws away cute little plastic or cardboard containers that wrapped food items come in.  This lidded container used to hold a wrapped crisco butter stick (know which ones I'm talking about-they come in packs of three)....but now it has been turned into a cute candy box filled with chocolate truffles!
I used a two 12" strips of DSP and wrapped the sides.  I also created a simple belly band to slide on and off for added decoration and topped it with a stamped ornament.
Next, I used the envelope punch board and created a simple box to hold 3x3" note cards with envelopes.  Teachers are all the time needing "Thank You" cards!!
 
Last, is a card using the same matching DSP.  I will have my son write a special Christmas thank you message inside.
 
I hope you have enjoyed my projects for this months blog hop!  Don't forget to leave a comment to be entered into my drawing for some FREE Blog Candy!!!  The winner will be announced Monday, December 16th, so don't forget to include your email address with your comment.  Now its time to hop on over to Jamie H. of Unique Ink, with her wonderful holiday projects!
 http://jhurley90.blogspot.com/2013/12/stylin-stampin-squad-december-blog-hop.html
 
BLOG CANDY, BLOG CANDY!!
Cloudy Day Embossing Folder, Two-Tone 1-1/4" Pink Pirouette Ribbon, Summer Smooches Designer Fabric Pack and Brights Designer Buttons!!
 
Project Supplies:
DSP:   Season of Style
Stamp Sets:  Christmas Collectibles, Petite Pairs and Best of Sentiments
Ink Colors:   early espresso, cherry cobbler, and old olive
Cardstock Colors:  cherry cobbler, crumb cake, whisper white and old olive
Misc.: ornament punch, crumb cake seam binding ribbon, candy dots, cherry cobbler bakers twine, emvelope punch board, recycled crisco stick container and the Hearts a Flutter framelit set
 
Blog Hop Participants:
1.Dawn S. of Dawn's Creative Chalet
2.Darcy J. of DJ's Stampin' Place
3.Annie L. of Love Me Cards
4.Cynthia R. of Ink-a-Doodle Creations
5.Jamie H. of Unique Ink
6.Kim R. of Stamping with Kim
7.Tonya B. of Stampin' with Tonya
8.Diana E. of Stampin' Fun with Diana
9.Heidi B. of Stuck on Stampin'
10.Bree R. of Craft-Somnia
11.Anastasia R. of Stampin' Blondie
12.Pamela W. of Stinky Tofu
13.Darla R. & Nancy K. of Stampin With Darla and Sisters

Wednesday, August 1, 2012

Teacher Tote #3

This teacher box is for my older sons male teacher.  He had only one so the ladies were easy to do totes for.  I made his to be a simply fancy favor box and turned it into a "Teachers Survival Kit".  Its filled with red pens/sticky note pad, and the items on the list.

Band Aid:  for when things get a little rough
Crayon: to color every day bright and cheery
Marbles:  to replace those you might lose from time to time
Mounds Cnady Bar: for the mounds of knowledge you share
Paper Clip: for when you need help holding things together
Rubber Band: to remind you to be flexible
Starburst Candy: to give you a burst of energy
Shiny Penny: to remind you that each will shine in his or her own special way
Eraser: to remind you that everyone makes mistakes
Animal Cookies: for when your class seems like a zoo
Toothpick:  to help "pick" out the good qualities in others

Teacher Tote #2

Here is another tote for my older sons Language Arts Teacher.  I made one of Becky Roberts cute little pocketbooks.  Head on over to her blog to get the instructions to make these are others, http://www.inkingidaho-tutorials.blogspot.com/. 

I filled this tote with the same items.

Teacher Tote #1

I have been working on teacher gifts for "Meet the Teacher Day".  Each year, I make a little something special and fill it with teacher items.  This tote, I made two of, one for each of my sons main teacher.  I filled them with red ink pens, decorated sticky note pad, mints and 4 3x3" thank you note cards and envelopes.  I have the pattern for the tote.  Email me directly if you would like to have it.  It is super easy to make.

Tuesday, August 9, 2011

Teacher's Apple Sticky Notes

Hello bloggers, this little project will knock your stamp blocks off!  Ha! Ha! jut had to say that!!  I made this cute little sticky notepad holder with the challenge over at http://www.thepaperplayers.blogspot.com/ in mind.  The challenge is to create a school themed item.  Head on over and get the details and to enter your creation. 

I love to make easle cards, and well that got me to thinking, why not make an easle notepad holder.  That way the teacher can use the sticky notes and enjoy the pretty front.  I also embossed the white background with the swiss dots embossing folder for a little textured touch.

SU! items used:
-  cardstock colors of:  soft suede, whisper white and riding hood red
-  punches used:  round tab, modern label and scalloped circle to make the bite marks
-  stamp set:  teenie tiny wishes
-  misc. items:  real red 1/8" taffeta ribbon and swiss dots embossing folder

Wednesday, May 18, 2011

Teacher Appreciation Mini Pocketbook w/ Notecards

Good morning bloggers!  This is my boys last week of school and I wanted to make a special gift for my youngest sons teacher.  She has been an awesome teacher!  Not that my older sons teacher is not, but the teacher is a MAN and I don't think he would like a purse filled with not cards:))

I made the purse using the wonderful tuturial from Becky Roberts at.  http://www.inkingidaho.blogspot.com/.  If you like to make items like this or would like to learn how, you need to head over to her sight and check it out.

To go inside the pocketbook, I made 8 bashful blue "Thank You" note cards using the new SU! Fabulous Florets stamp set.  I also made my own matching white envelopes.  I hope you can see the detail of the purse.  I inked around the edges and even stamped the flower image from the same stamp set.  I used the flowers from the Fun Flowers die (again I hope to see this in my future soon!!-I hear its coming back for the new July catalog)

SU! colors used:  marina mist, bashful blue and night of navy