Showing posts with label Craft Room. Show all posts

Wednesday, July 30, 2014

Storing and Organizing My Cardstock

Good morning and thanks for stopping by.  Today is a quick post, but an important one.  I get all the time from others this question: "How do you organize and store your cardstock and scraps?"  Well that's what I want to share with you today.  There are so many ways of organizing your paper and scraps but this way I have found to really work for me. 

First lets start with how and where I store my 12" x 12" sheets of cardstock and matching 8-1/2" x 11".  I bought these shelving units off of Amazon a few years ago and they work great for me.  They are sturdy and have a solid shelf so your paper does not get a bent corner when sliding in and out. 

 
I used to keep my cardstock together by color family, but then it got to be to time consuming to search for a particular color.  Example:  I need a red, I would have to look in 4 areas.  So now I keep all of one color together.  Example:  reds, yellows, greens, etc...  You can see this in the below picture.  I use a 12" piece of cardboard (recycled too.  These come from my scrapbook page packs I use from Creative Memories or just misc. cardboard that I get my hands on.  I punch out a label and write the color on it and staple it to the cardboard.  Nothing fancy, but it works for me.
 
 
So lets look at one color and focus on it.  Lets pick my favorite green, "old olive"!!!  On one shelf, I keep on the bottom the cardboard, my 12" cardstock then my pack of 8-1/2"x11".  Then on top I have file folder, labeled with a sample and the name of the color of cardstock.  The folder holds large pieces of scraps.  This is seen below.

 
So I am not one to waste my cardstock.  I spend my hard earned $ on buying or earning it, and I want it to last.  In the folder is large scraps. 

 
Now for my small scraps, I do something a little different.  This is the system that I have changed several times trying to get a system that worked.  I used to use binders with plastic sleeves but it got to big and bulky and I never went to it, cause it wasn't small and handy when I needed a small piece.  I found that I was getting a whole new sheet, when I didn't need it.  This, I have been using for almost 3 years and it works for me.  Having it right in front of me, helps me not go get a new sheet when I just need something small.  Example:  I stamped a small sentiment and I'm gonna punch it out, or I need to punch out circles.  Its just a plastic draw organizer basket that I picked up at my local Dollar Store, Family Dollar, Dollar Tree or even a Walmart has them. 

 
I use letter sized envelopes to hold each color.  Example:  yellows, greens, blues, etc...  whisper white and very vanilla is always in the front, cause I tend to go for them more often for sentiments.  Now I just hand write off to the size the shades of yellow.  I am usually pretty good at knowing a paper color when I look at it, but its there as a quick reference just in case I haven't had enough coffee!!!


When I see that my folder is getting over run with to small a pieces,  I do clean it out about once every couple of months, but I don't keep but so small of a piece anyway.  This system has really saved me on wasting whole sheets of paper.  I always go to my basket first if I need a small scrap piece and then to my folder if I need something a little larger before ever going to get a new whole sheet.
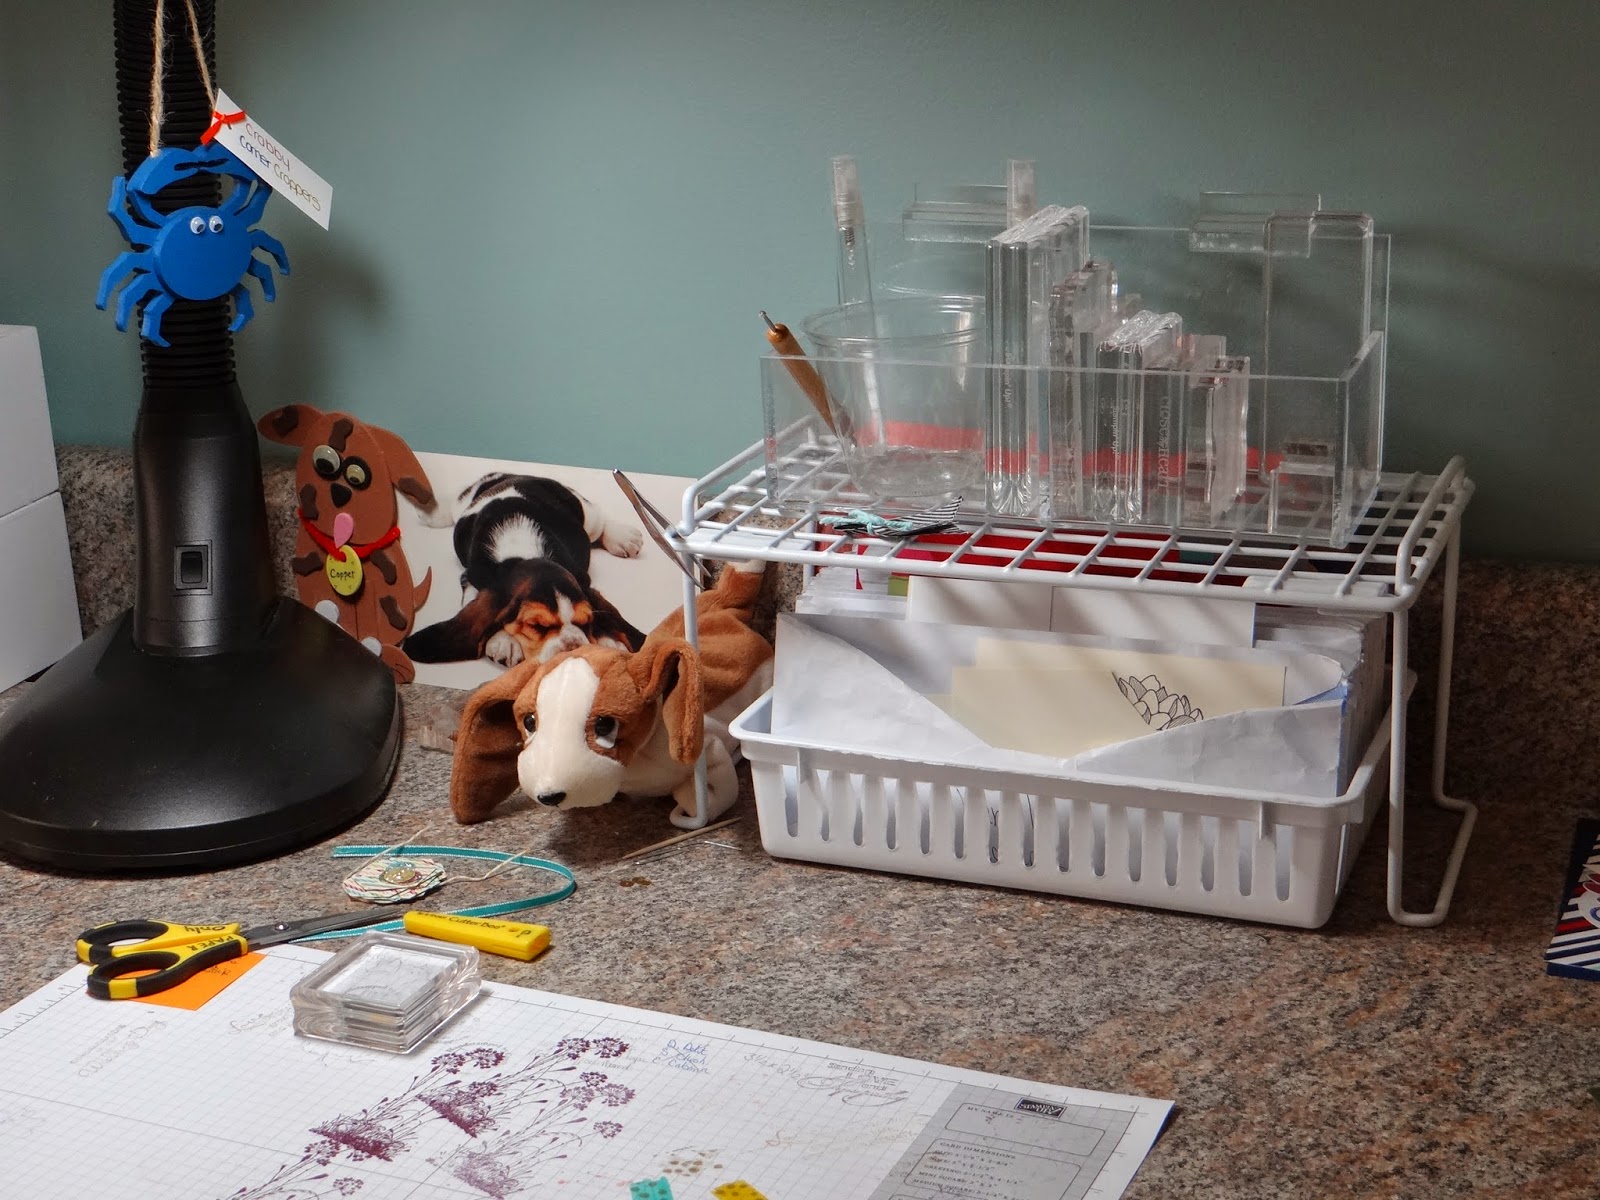
 
 
I keep my small scrap basket right in front of my work area.  It sits under a wire shelf so its out of the way, but can slide it right out when I need a small piece.
 
I hope by sharing my way of organizing my paper, it helps you to work on and get your over run paper stash organized.  Cause "organization" is my middle name and I LOVE it!!!


Monday, January 9, 2012

A Little Wall Art

I have been wanting to recreate the scattered flowers you see in the front of the full catalog.  So last week I did it!  I several colors from each color family and punched out flowers/petals from the Build a Blossom punch and the new Blossom punch from the new occasions mini.  I centered each with a flat white push pin and pinned them to the wall around the definition of "CREATE".  I used my Cricut and black vinyl sheets to cut out all letters to finish the definition.  I love how it turned out.  Leave me feedback, so I can hear what your thoughts are!

Tuesday, August 30, 2011

Ohhhoooo...Auhhhhh My Finished Room Swap!!!

 Its girls, the day has finally come to say my room swap project is done!! (well for the most part.  I can at least walk inside and make a card if I want.  There is still somethings to hang back on my sons walls and mine, but pretty much done.  What do you think?!?!  I would love to hear your thoughts and suggestions.  This pic above is my sons room now,  this is the sleeping area and on the other side of his bed, will be his desk when we get it!)
 This is the other side of room (it measures 20'-8" by 10").  This is his play area side.  Now I think he still wants to save his money for a bigger TV, now that he has the room!  Go for it Andrew!
 Now for the best room in the house!!  Drum roll please.......my craft room.  I want to place on the wall right above these white cabinets "Ink-a-doodle creations" with my black vinal and spread some colored flowers around it, like what is in the front of the New catalog from SU!  I think it will be awesome!!
 This cabinet holds my stamp sets.  I went through all of the old wooden sets and converted them over to clear mount (it gives me so much room for more sets of course!!)  The paper rack holds my In-Colors only in cardstock.  On top, sits things that I have made or someone has given me.
 As you can see, I love 4 things:  stamping stuff of course, barbies, eeyore and old antique childrens toys.  This cabinet holds all of my finished and in progress scrapbooks.
 This is my cabinet that holds my cricut and my old antique school desk.
 I have so many barbies that when we moved to this house, I had to sell alot.  I kept my favorite ones and have them on display across the top of this wall.  I do some special procealine barbies and they are protected in a glass cabinet downstairs.  This is my work station.  My uncle made me these ink holders.  They are awesome, they hold the ink pad, pen and refill bottle.  I am very organized and everything is in its place.
 More barbies and my area where I sit.  I say that because right above me is my slat board and it holds all of the items I use all the time, such as:  adhesive, clear blocks, ribbons and such.
This is the last stop.  This is not quite finished because my hubby still needs to hang up 2-3 more racks for my punches.  This is also my cardstock area.  I hope you have enjoyed the tour of my new craft room.  I know I am so happy to be in my own room, just like back in Luray!  Home Sweet Home!

Wednesday, August 24, 2011

New Project of Mine!?!?!

Good afternoon bloggers!  Today I don't have a project for you to look at, but just checking in to let you know of the big project that I am working on in my house.  Drum role please,......my younger son and I are switching rooms.  You say, how is that exciting news?!?  Well my room is long and narrow, so one half was my creation craft room and the other part I had to share with my parents as a spair bedroom.  Well I feel bad, cause my younger son has always had the smallest room in house and the older son gets the larger bedroom.  So we are switching, what that means for me is this, he gets the large room to himself, I take over his bedroom (which is much bigger than what I have now) and well, Mom and Dad, sorry you get to either sleep on couch when you come over or sleep in the boys beds and they can camp out.  We found that having the spair bed was a waist of space, cause they don't come over and spend the night as much as they used to when we first moved away. I will try and post pictures of the move.  Right now everything in my room is coming down so that I can paint over the purple walls.  Andrew for some reason does not think purple walls is cool in a boys room!! 


                                                            THE FUTURE CRAFT ROOM!!!
My goal:
1)  today---take down everything off walls and move out furniture today, so that I can paint tomorrow and goes buy the paint at Lowes this afternoon after kids leave.
2)  tomorrow---paint
3)  friday and saturday start switching all the stuff and get extra bed taken down.
(oh yea, 2-4pm on Sat., have our cub scout splash down event and rush back to finish up switch, wish me luck!!