Wednesday, July 30, 2014

Storing and Organizing My Cardstock

Good morning and thanks for stopping by.  Today is a quick post, but an important one.  I get all the time from others this question: "How do you organize and store your cardstock and scraps?"  Well that's what I want to share with you today.  There are so many ways of organizing your paper and scraps but this way I have found to really work for me. 

First lets start with how and where I store my 12" x 12" sheets of cardstock and matching 8-1/2" x 11".  I bought these shelving units off of Amazon a few years ago and they work great for me.  They are sturdy and have a solid shelf so your paper does not get a bent corner when sliding in and out. 

 
I used to keep my cardstock together by color family, but then it got to be to time consuming to search for a particular color.  Example:  I need a red, I would have to look in 4 areas.  So now I keep all of one color together.  Example:  reds, yellows, greens, etc...  You can see this in the below picture.  I use a 12" piece of cardboard (recycled too.  These come from my scrapbook page packs I use from Creative Memories or just misc. cardboard that I get my hands on.  I punch out a label and write the color on it and staple it to the cardboard.  Nothing fancy, but it works for me.
 
 
So lets look at one color and focus on it.  Lets pick my favorite green, "old olive"!!!  On one shelf, I keep on the bottom the cardboard, my 12" cardstock then my pack of 8-1/2"x11".  Then on top I have file folder, labeled with a sample and the name of the color of cardstock.  The folder holds large pieces of scraps.  This is seen below.

 
So I am not one to waste my cardstock.  I spend my hard earned $ on buying or earning it, and I want it to last.  In the folder is large scraps. 

 
Now for my small scraps, I do something a little different.  This is the system that I have changed several times trying to get a system that worked.  I used to use binders with plastic sleeves but it got to big and bulky and I never went to it, cause it wasn't small and handy when I needed a small piece.  I found that I was getting a whole new sheet, when I didn't need it.  This, I have been using for almost 3 years and it works for me.  Having it right in front of me, helps me not go get a new sheet when I just need something small.  Example:  I stamped a small sentiment and I'm gonna punch it out, or I need to punch out circles.  Its just a plastic draw organizer basket that I picked up at my local Dollar Store, Family Dollar, Dollar Tree or even a Walmart has them. 

 
I use letter sized envelopes to hold each color.  Example:  yellows, greens, blues, etc...  whisper white and very vanilla is always in the front, cause I tend to go for them more often for sentiments.  Now I just hand write off to the size the shades of yellow.  I am usually pretty good at knowing a paper color when I look at it, but its there as a quick reference just in case I haven't had enough coffee!!!


When I see that my folder is getting over run with to small a pieces,  I do clean it out about once every couple of months, but I don't keep but so small of a piece anyway.  This system has really saved me on wasting whole sheets of paper.  I always go to my basket first if I need a small scrap piece and then to my folder if I need something a little larger before ever going to get a new whole sheet.
 
 
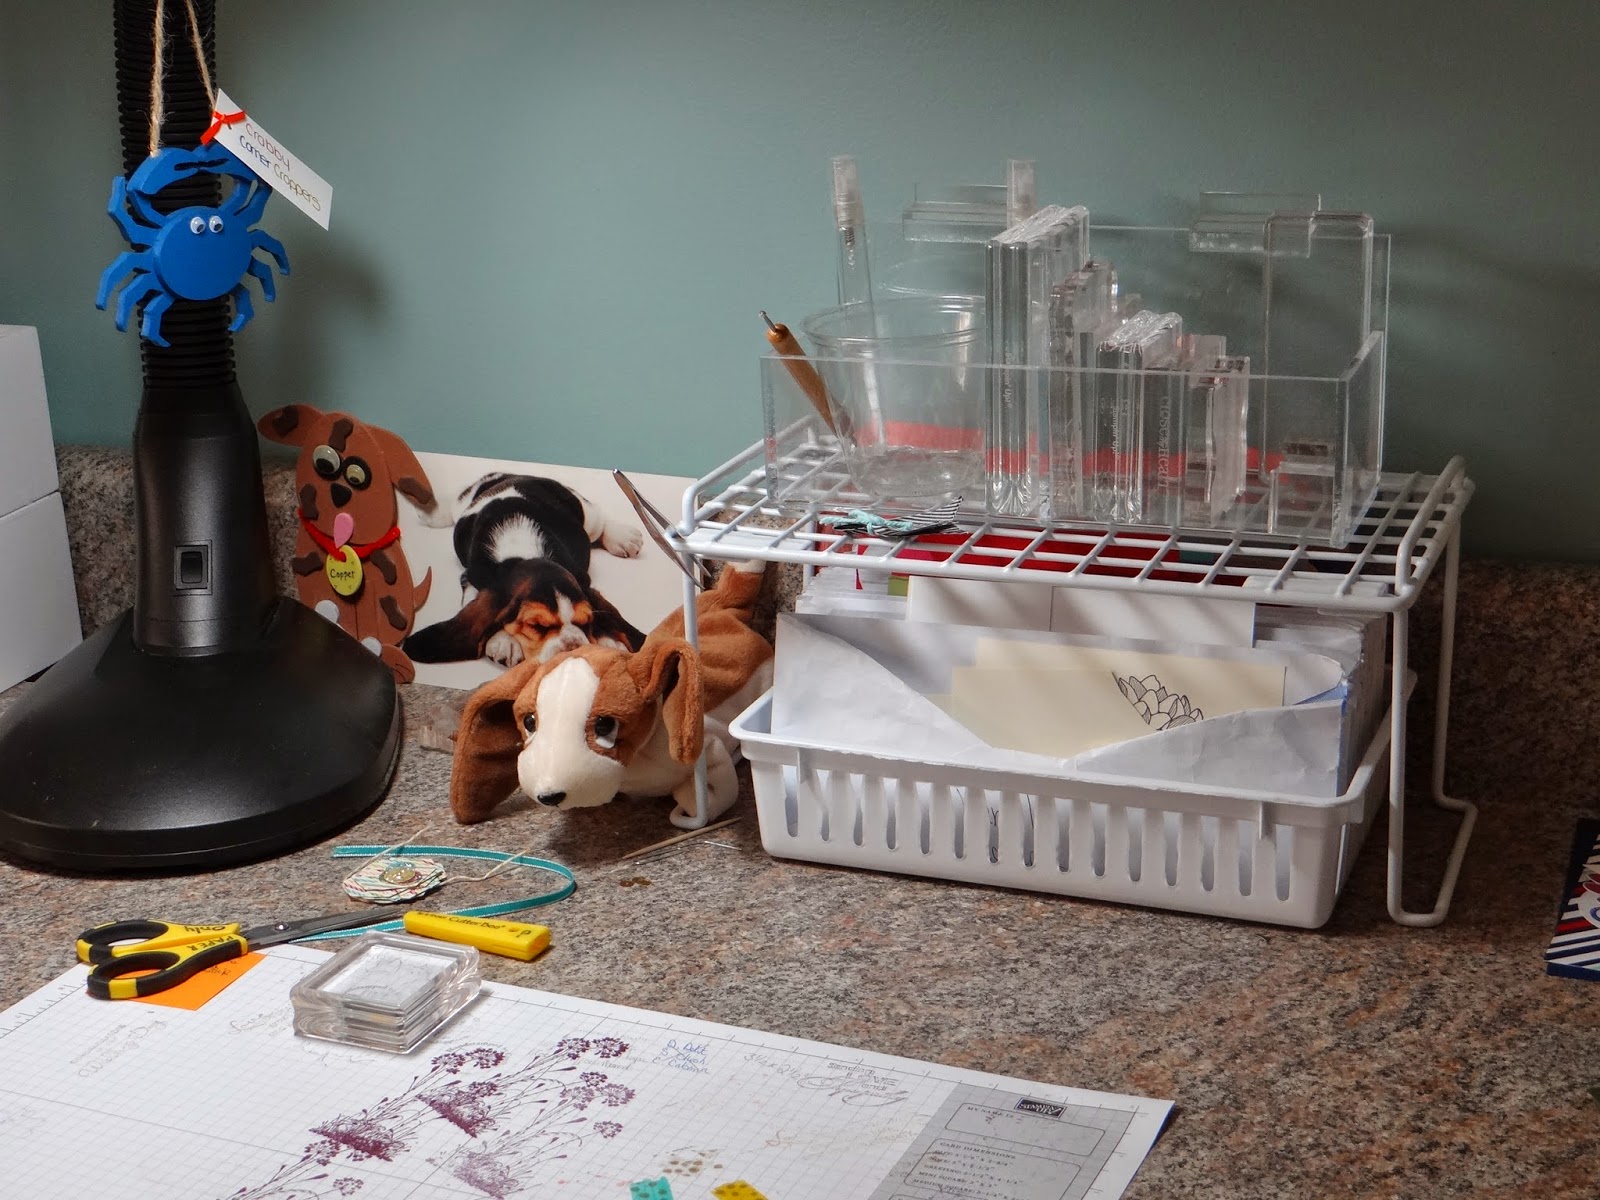
I keep my small scrap basket right in front of my work area.  It sits under a wire shelf so its out of the way, but can slide it right out when I need a small piece.
 
I hope by sharing my way of organizing my paper, it helps you to work on and get your over run paper stash organized.  Cause "organization" is my middle name and I LOVE it!!!


Tuesday, July 29, 2014

Note Card Gift Box with Tutorial at SSInk

 
Good morning and thanks for joining me here at Ink a Doodle Creations!  Today is my individual post over at Stylin' Stampin' INKspiration.  This stop is just a sneak peek.  To get the whole scoop on how I made this cute little note card gift box, you'll need to click the link above to view my tutorial.  I even have a new fun set to show ya over there.  So what are you waiting on.....get to clickn'!!!!


Monday, July 28, 2014

Happy Birthday with FabFri46 & HSS190

Good Monday morning!  Time to start a new week and what better way to do that, than with a challenge or maybe even two challenges all into one!  Love it when I can combined a color challenge and a sketch challenge together.  Double the fun, right?!  Todays card is for the color challenge at Fab Friday and the sketch challenge at Hand Stamped Sentiments.  Check out what I came up with! 
 
 
So you'll be surprised when I say the first thing I started out with was the punched out glimmer paper in circles.  I used up some scrap pieces of silver glimmer paper, punched them out in circles of 1", 3/4" and 1/2", then I colored them with my strawberry slush, daffodil delight and coastal cabana markers.  They turned out AWESOME!!!
 
The dotted background is from the Confetti DSP pack.  I even got creative with my gold polka dotted washi tape. I colored it using my lightest shade of daffodil delight and med. shade of coastal cabana blendabilities.  I love how universal these things are.  I used the stamp set "Bravo" and "And Many More" for my sentiments. 
 
Supplies Used
 
I hope you have enjoyed my take on these two great challenges.  Leave some "love" and come back tomorrow.  I have my individual post over at Stylin' Stampin' INKspiration, where I will be showing how I created the fun and easy note card box from yesterdays Christmas in July post, but with a new design. 

Thursday, July 24, 2014

A Little Christmas in July with SSInk

 
Good morning and thanks for joining me.  Today I am over at Stylin' Stampin' INKspiration and we are sharing a little Christmas in July.  I know some of you may think its way to soon to think about Christmas, right?  I agree as far as shopping and decorating goes, but if you send out a lot of holiday cards and make handmade paper gifts, then now is the time to start thinking about what type of cards, projects you want to send out and make for gifts.  Don't forget to head over to our main blog today, and see what all of our design team members have created.  We hope that we INKspire you to go create!
 
So for my project today, I want to share with you a thank you note card gift set I made.  I made two very quickly and these will be teacher gifts for my youngest son for Christmas.  Teachers get lots of special gifts and this would be a nice set of note cards for her to use to send out in appreciation of those gifts.  I say two gift sets, but you will only see this set today.  The other set with a step by step tutorial will be on our main blog, Stylin' Stampin' INKspiration, Tueday, July 29th.  Don't forget to stop by for full instructions and see the other special gift set!

 
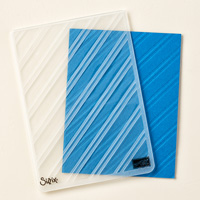
I used the Joyful Christmas stamp set to stamp each note card and an extra one, which I cut out to place on the outside of my box.  I colored them with my cherry cobbler blendabilities.  I think they turned out beautifully!  To create the horizontal stripped belly band wrap for the box, I inked up my stylish stripes embossing folder and ran it thru my big shot.  I also stamped a simple Thank You sentiment from the Petite Pairs stamp set for each note card and for the banner tag on the box.  Now what teacher or friend, wouldn't love a personal gift like this.

 
This stamp set is still available for purchase but only until August 27th, 2014.  So if you want it, I wouldn't wait to the last minute to get your hands on it.  Click any item in the supplies list below to head over to my online order site where you can place your order and have it delivered right to your door step! 
I hope you have enjoyed my project for our Christmas in July post.  Don't forget to leave some "love", and head over to our main blog to see the other design team members projects.  Come back on the 29th to see just how I made this cute little gift set and see my other version!!

Friday, July 18, 2014

SU! 2014 Convention Display Board Contest Project #3, 4 & 5


Good morning and thanks for stopping in to visit my blog while I'm out of town at the inspire.create.share 2014 Stampin' Up! Convention.  Yesterday, I shared projects 1 and 2.  Today I am sharing my last two cards and my 3-D project.  The design team that I am a designer for, Stylin' Stampin' INKspiration, was selected to design a display board for convention this year.  Stampin' Up!, has put a contest in place.  A number of design teams have been selected to design boards in the display room.  A winning display board will be selected, but in my eyes, we are ALL WINNERS!  We all get to have our creative artwork on the boards for all to see and enjoy!  I have had so much fun in creating my 4 cards and 3-D item.  Each of us who wanted to participate, chose one stamp set to work with a create our projects around.  I decided to go with "Flower Patch".  When you are done viewing my post, don't forget to click over to our main blog and see some of the other display projects from our design team members!


This card has a base color of crumb cake with a tangelo twist layer.  I rounded the corners of the base and layers for a different look.  Simple changes can make a big impact.  My crumb cake layer is stamped using again the Flower Patch stamp set in colors of tangelo twist, crumb cake and mossy meadow.  I am so in love with our newest set of in colors!  My sentiment is stamped on a simple border strip and held on with some new in color ribbon to match.  If you look closely, you will see that I added a crumb cake candy dot to the center of each flower.


Now this card is most different in design.  Its a paper bag pocket card.  I cut down to size one of the chevron stripped paper bags and created a simple set of layers for the card inside.  I created a layer of flowers in coastal cabana, pear pizzazz and strawberry slush.  I love how this stamp set has a matching framelit set.  It makes it so easy for cutting out.  The Flower Patch stamp set, comes with three different sentiments.  This one is stamped on a simple banner and tucked behind.  I tied on a bow using the new cotton ribbon in pear pizzazz.


Now for my final display board project, I signed up to create a 3-D item.  I purchased a simple black wooden 5x7 picture frame and distressed and sanded it down along the inner and outer edges with sand paper.  I wanted a fall look as this has a picture of my son when he was little with his pumpkins.  I used colors of hello honey, mossy meadow and cajun craze to stamp the flowers and leaves.  I added a small pearl to the center of the smaller flowers and one cajun craze button to the center of the larger flower.  I also accented with some gold bakers twine.  The funniest part of this project is the chicken wire that I inserted as the background since I used a small wallet sized photo.  A cute little wooden clothes pin holds the stamped sentiment.

Supplies Used
Cardstock ~ crumb cake, tangelo twist, strawberry slush, whisper white
Ink ~ tangelo twist, crumb cake, mossy meadow, costal cabana, pear pizzazz, strawberry slush, cajun craze, hello honey
Stamp set ~ flower patch
Misc. ~ tangelo twist in color satin ribbon, neutral candy dots, basic rhinestones, pear pizzazz cotton ribbon, black wooden picture frame, regal buttons, basic pearls, wooden clothes pins, hot glue gun

Again, thanks for stopping by to visit my convention board projects.  Leave some "love" and don't forget to go see some more projects from our other design team members.  Wish us luck!


Thursday, July 17, 2014

SU! 2014 Convention Display Board Contest Project #1 & 2


Good morning and thanks for stopping in to visit my blog while I'm out of town at the inspire.create.share 2014 Stampin' Up! Convention.  I not only have one, but two projects to share with you today.  The design team that I am a designer for, Stylin' Stampin' INKspiration, was selected to design a display board for convention this year.  Stampin' Up!, has put a contest in place.  A number of design teams have been selected to design boards in the display room.  A winning display board will be selected, but in my eyes, we are ALL WINNERS!  We all get to have our creative artwork on the boards for all to see and enjoy!  I have had so much fun in creating my 4 cards and 3-D item.  Each of us who wanted to participate, chose one stamp set to work with a create our projects around.  I decided to go with "Flower Patch".  Here are the first two cards I am sharing.  Don't forget to stop by tomorrow to see the next two cards and my 3-D project.  When you are done viewing my post, don't forget to click over to our main blog and see some of the other display projects from our design team members!


I would say that this is one of my favorites, but well they all are my favorite, so I'll save my words!!  This card has a night of navy card base white a white layer that I embossed with the large dots folder.  (now this is one of my favorite new folders!!)  I used the Flowerpot DSP pack for the large and mini banners across the bottom.  I stamped my flowers in lost lagoon, hello honey and tangelo twist.  I added some coordinating candy dots to the center of each and added some natural twine behind them.


For this card, I used the new Typeset DSP.  This truly is one of my favorite display cards.  I love how its all black and vanilla.  My base is black with a layers of vanilla and a layer of DSP.  I also added a set of layers in black and the horizontal stripes from the same DSP pack.  If you look closely, I used my handy dandy sewing machine and sewed around the edges of these two layers.  Flowers were stamped in basic black in layers with a solid cut out matching flower behind it.  I added pearls to the center of each flower.  Can't forget the bling!!  My favorite element, is the lace that goes across the bottom.  I added a couple black candy dots in the upper left corner and my card is done.

Supplies Used
Cardstock ~ night of navy, whisper white, lost lagoon, basic black and very vanilla
Ink ~ lost lagoon, hello honey, tangelo twist, basic black
Stamp set ~ Flower Patch
DSP ~ typeset and flowerpot
Misc. ~ flower patch framelit set, basic pearls, banner punch, natural twine, subtle candy dots, venetian crocket trim

Wednesday, July 16, 2014

Inspare.Create.Share 2014 Stampin' Up! Convention Swaps

Good morning and thanks for stopping by my blog this morning.  Well if you are reading this post early this morning, I am already on my plane and headed to convention!  If you are a guy, you probably don't wonna be on any flight headed to Utah right now, cause I know there will be ALOT of screaming happy woman on there!  Poor dudes, they didn't even see it coming!

For todays post, I wanted to share my "general swaps" swaps with you.  If you can find me, and your at convention too, I'd be happy to swap cards with you!

Last year I did about 75 general swaps and I participated in two organized swaps.  This year is a little different and lighter for me.  I am participating in only one organized swap (you'll get to see that card in August when we do our Blog Hop at Stylin' Stampin' INKspiration), and only 30 general swaps, 10 each of 3 different designs. 

Would you like to Win a Prize?!  I know, that's a silly question!  Here is all you need to do to win. 
1.  Follow my blog
2.  "Like" Ink a Doodle Creations on Facebook
3.  Leave a comment as to which is your favorite swap card.

One lucky random winner will be drawn and will receive that swap card and a special SECRET item!

Swap #1


Swap #2
 

Swap #3
 

I hope you have enjoyed taking a sneak peek at my swap cards.  Don't forget to leave your comment for a chance to Win your favorite swap card and a special prize!  Make sure you visit my blog tomorrow and Friday, as I will be sharing my projects created for the group display board at convention!

Supplies Used
Colors ~ blackberry bliss, very vanilla, lost lagoon, hello honey.  Very vanilla, calypso coral, crumb cake.  Night of navy, coastal cabana, real red, whisper white.
Stamp Sets ~ Regarding Dahlias.  Pleasant Poppies.  Sea Street

Tuesday, July 15, 2014

Snowflakes in July...What?! Merry Monday #117

Well my swaps are complete, bags are packed and my flight for 7:15am is confirmed!  I'm ready to head to Salt Lake City, Utah for the Inspire.Create.Share 2014 Stampin' Up! Convention.  Its hard to believe that its been a whole year already since I went last year.  Time sure does fly.  To kill some of the quietness in this house since the boys are away, I headed to my craft room, cranked up the radio and put together this card for the challenge over at Merry Monday.  Yep its a Christmas challenge.  Not that I'm ready for Christmas, but with snowflakes it makes me think cooler and I hate to say it, but I'm ready for some cooler weather already.  Now come October/November when I'm out running in freezing my butt off temps, I'll say other wise.....Brrrrr!!!


The challenge, if you choose to except it (sorry, I'm in a James Bond kinda mood I guess!!) is to create a holiday project and add sequins to it.  And I did just that, but in a cute snowflakes nontraditional color sort of way.  Here's what I came up with...
 
 
One of my favorite holiday/winter sets is the Festive Flurries stamp set with its matching snowflake framelits.  I hope these stay a long while longer.  I kept the sketch really simple with a stylish striped embossed whisper white layer down the middle, a collection of banners using colors of whisper white, coastal cabana and strawberry slush.  I then stamped a smaller snowflake in coastal cabana and a larger one in strawberry slush.  Don't get me wrong, I love traditional holiday colors, but I also enjoy outside the box, nontraditional colors too.  I wrapped and tied a bow using the black bakers twine and scattered around some of the new in color sequins. 

 
Supplies Used
Cardstock ~ whisper white, soft sky, strawberry slush, coastal cabana
Ink ~ strawberry slush and coastal cabana
Stamp set ~ festive flurries
Misc. ~ black bakers twine, in color sequins, festive flurry framelits, basic rhinestones, banner punch, stylish stripes embossing folder
 
I hope you have enjoyed my snowflakes in July project card.  Leave some "love", and head back tomorrow for a card swapping good!!


Flower Patch Fun CTS#84

Good morning and OH MY GOSH...I'm soooo excited I could SCREAM!!!!  Why...cause I leave bright and early tomorrow morning to head to the airport.  Now just why is the airport so exiting...well duhhh....it's because I'm headed to Salt Lake City, Utah for the Inspire.Create.Share 2014 Stampin' Up! Convention!!   Ok, now that that Big and Important announcement is out of the way, we can get on with this mornings post and sketch challenge over at Cas(e) This Sketch

 
This sketch is kinda freakin' me out, cause two weeks ago I was playing  around with an idea in my head for a convention swap card and this was the same kind of sketch.  Weird how things work out like that!  Even though I went with another idea, I still had my demo card laying there on the counter.  I changed up the color combos and decided to enter it in for this sketch challenge.
 
 
So my base starts out with pear pizzazz with some strawberry slush and whisper white.  I used colors or crisp cantaloupe and strawberry slush for my flowers using the Flower Parch stamp set.  The leaves are also stamped in pear pizzazz.  This sentiment from the set fits perfectly for the layer going across the middle of the card.  Now, just because its a simple sketch, doesn't mean it can't have some bling.  Gotta love the bling!  I added a few of the new in color sequins for that little sparkly touch!

 
On the inside, I stamped the same flowers in the same colors in two corners, making sure to leave plenty of room for a hand written message.
 
Supplies Used
Cardstock ~ pear pizzazz, strawberry slush, whisper white
Ink ~ pear pizzazz, strawberry slush, crisp cantaloupe
Stamp set ~ Flower Patch
Misc. ~ In color sequins
 
Thanks for dropping by to see my challenge card in detail.  Leave some "love", and make sure you head back tomorrow to check out my cards I created for convention swapping.  Who knows, if you are there, maybe you will wind up with one!!


Monday, July 14, 2014

Project Life Inspired July Card Sketch Challenge

 
Good morning.  I hope everyone had a lovely weekend.  I really did.  Since my kids have been gone for two whole weeks, visiting with my sister and brother in law for one week and this week they are spending with my parents, my husband and myself and been taking it easy and enjoying a drama free house.  Now my kids are 14 and 11, so it isn't like we have to really keep an eye on them like they were two, but lets just say that two boys at this age can still carry on and create drama like a bunch a little ones!!!  Saturday we spent the day at Virginia Beach and enjoyed a quiet dinner at TGI Friday's.  Yesterday was spent here at the house all by little self.  Hubby went to a baseball card show with his Dad, where he got Johnny Bench's and Pete Rose's autograph.  He was so excited to come home and show me his new toys for his room!  (like a kid in a candy store, might I add)!
 
Today over at Stylin' Stampin' INKspiration its the third Monday and you know what that means...yep, its card sketch challenge time.  Todays card sketch is Project Life inspired.  I hope you get inspired and decide to play along with us.  We can't wait to see what you create!


So after putting together my Project Life album, I had lots of cards left from the Everyday Adventure collection, so this sketch was the perfect time for me to use them up.  I pulled out one that just said "happy" on it and paired it with a solid patterned card, perfect for a background.  In this case a polka dotted one.  I used the Endless Wishes stamp set to stamp the word "birthday" at the bottom to create the perfect cute and simple birthday card.  I pulled out the metal arrow clip and wooden arrow from the Everyday Adventure accessory kit.  I love how these kits really do coordinate well together.  The finishing touch was adding the brights candy dots and attaching a cute twine bow at the top.
 
 
On the inside I added a simple border strip that also came in the accessory kit.


Supplies Used
Cardstock ~ basic black and whisper white
Ink ~ strawberry slush, bermuda bay
Stamp sets ~ Endless Birthday Wishes
Project Life ~ everyday adventure card collection, everyday adventure accessory pack
Misc. ~ strawberry slush thick twine, brights candy dots
 
I hope you have gotten INKspired to go create a card using our sketch.  Don't forget to come back and link it up to our main blog challenge site and go see what our other design team members have created.  I'm sure you are gonna love theirs too!

Friday, July 11, 2014

Friends Who Know FabFri45

Good morning... wait for it...wait for it...its Friday, Friday, Friday!  I just love saying that!!  Now that I have that out of my system!!  Tee Hee!  Thanks for droppin' in and visiting my blog today.  Todays challenge card is for the sketch over at Fab Friday.  Like many of us Stampin' Up! Demo's, we are busy running or should I say "stampin" our way around like a chicken with his head cut off, finishing or (starting) our swaps for convention next week!  I'm proud to say that all my sways are done and ready to go!  I still have one important birthday card to make, but that's it!  This little extra special card is for a friend who I will be seeing at convention again this year.  Last year was our first time attending convention and we got to share it together.  We live thousands of miles apart but chat every day.  I can't wait to see her again and spend some time together!

 
When I saw this "friends who know" stamp in the new catalog, I knew I just had to have it!  Its just so fun.  I knew this was the stamp to make a special card with for my friend and I wanted to make it extra bright and cheery!  My base is daffodil delight with a layer of melon mambo and decorative dots embossed white.  I used a piece of dsp from the sweet taffy pack down the side and pulled coordinating colors from it for the banners down the side.

 
I used my markers to color in the writing and swirls on the stamp.  Its awesome when stamped in basic black.  I added a cute whittle vintage faceted button with a white bakers twine tied bow.

 
On the inside, I added another matching strip of dsp and added more cute banners.  I will hand write a personal message inside.
 
Supplies Used
Cardstock ~ whisper white, melon mambo, daffodil delight, basic black, tempting turquoise, rich razzleberry, pumpkin pie, old olive
Ink ~ basic black
Stamp ~ friends who know
DSP ~ sweet taffy
 
I hope you have enjoyed my challenge card.  Leave some "love" and come back on Monday to see what I've been creating for my next challenge!!
Misc. ~ white bakers twine, vintage faceted buttons


Thursday, July 10, 2014

A Little Bit Old & New - SSINK Blog Hop!

 
Good morning!  Thanks for joining me here at Ink a Doodle Creations.  Today I am over at Stylin' Stampin' INKspiration and we are celebrating our first Blog Hop!!  We are sharing projects using something OLD and something NEW!  I hope you will take a few minutes and come visit all of our design team members to see what projects they have created.
 
As you hop along, please be sure to comment and show some love on every blog! We are always excited to hear from our followers! You should have just left stop number #5 on the Stylin' Stampin' INKspiration Blog Hop - Donna S. of Organized Chaos . If so, you are in the right spot. If a link doesn't work or you get off track, you will find the full blog hop lineup below.
 
Its fun to look back over the years of my stamping career and look at all the many different stamp sets I've had.  Some I've used a lot and some not so many times.  I could have gone back and pulled out one that was really old, but the one I chose to use, is for me, one that I will continue to use for a long time, cause mason jars will always be around.  Rather in stamping, drinking from (if you are a Southern and like your sweet tea) or just for decorating with or canning in.  Mason jars will forever be popular.
 
 
For my something OLD, I chose to use the retired Perfectly Preserved bundle.  I just love the cute little mason jar.  For my something NEW, I went with Papillon Potpourri.  The cute butterflies coming out of the jar is so cheerful!  I accented the front by embossing my crumb cake with the woodgrain folder and added some cut burlap and rich razzleberry cotton ribbon.

 
I think my favorite part is the natural twine wrapped around the jar lid and finished off with a cute melon mambo button.
 
I hope you have enjoyed my blog hop project!  Leave some "love", and head over to stop #7 with Kim R. of Stamping with Kim.  I just know you will love her creation!
http://rydenkim.blogspot.com/2014/07/ssinkspiration-blog-hop.html


Wednesday, July 9, 2014

Polka Dot Happy with Curtain Call Challenge

Good morning, its hump day!  Officially #1 week until I leave to head to Utah for Stampin' Up!'s Convention.  Girl time here I come!!!  Todays card is for the challenge over at Curtain Call.  My card is a little different in the since that it isn't really for a Birthday, unless your turning an age your not particularly happy with!!  HA! HA!  No, my card is to cheer someone up!  When I looked at the inspiration photo, I saw bright colors and polka dots. 

 
I used the new dots and stripes masking template to create my polka dots for my background.  I used colors of coastal cabana, crushed curry, crisp cantaloupe and strawberry slush.  the tag stamped with "cheer up buttercup" is from the project life label framelit set.  I tied it on with some of the new in color thick twine and added a clear button with a bow in black bakers twine.

 
Some cute polka dots added to the inside makes for easy and quick decoration

 
I hope you have enjoyed my challenge card.  Leave some "love", and don't forget to come back tomorrow to see what I've been working on!
 
Supplies Used
Cardstock ~ basic black, whisper white, strawberry slush
Ink ~ coastal cabana, strawberry slush, crisp cantaloupe, crushed curry
Stamp set ~ Geometricial
Misc. ~ basic rhinestones, black bakers twine, coastal cabana and strawberry thick twine, vintage faceted buttons, dots and stripes masking templates