Thursday, January 30, 2014

Movin' with Simple Stems!

http://www.ssinkspiration.blogspot.com/

Good morning bloggers and welcome to Stylin' Stampin' INKspiration.  Today our design team members are sharing projects with moving parts.  I chose to use products from the new Sale-a-Bration brochure and the new Mini Occasions catalog. 


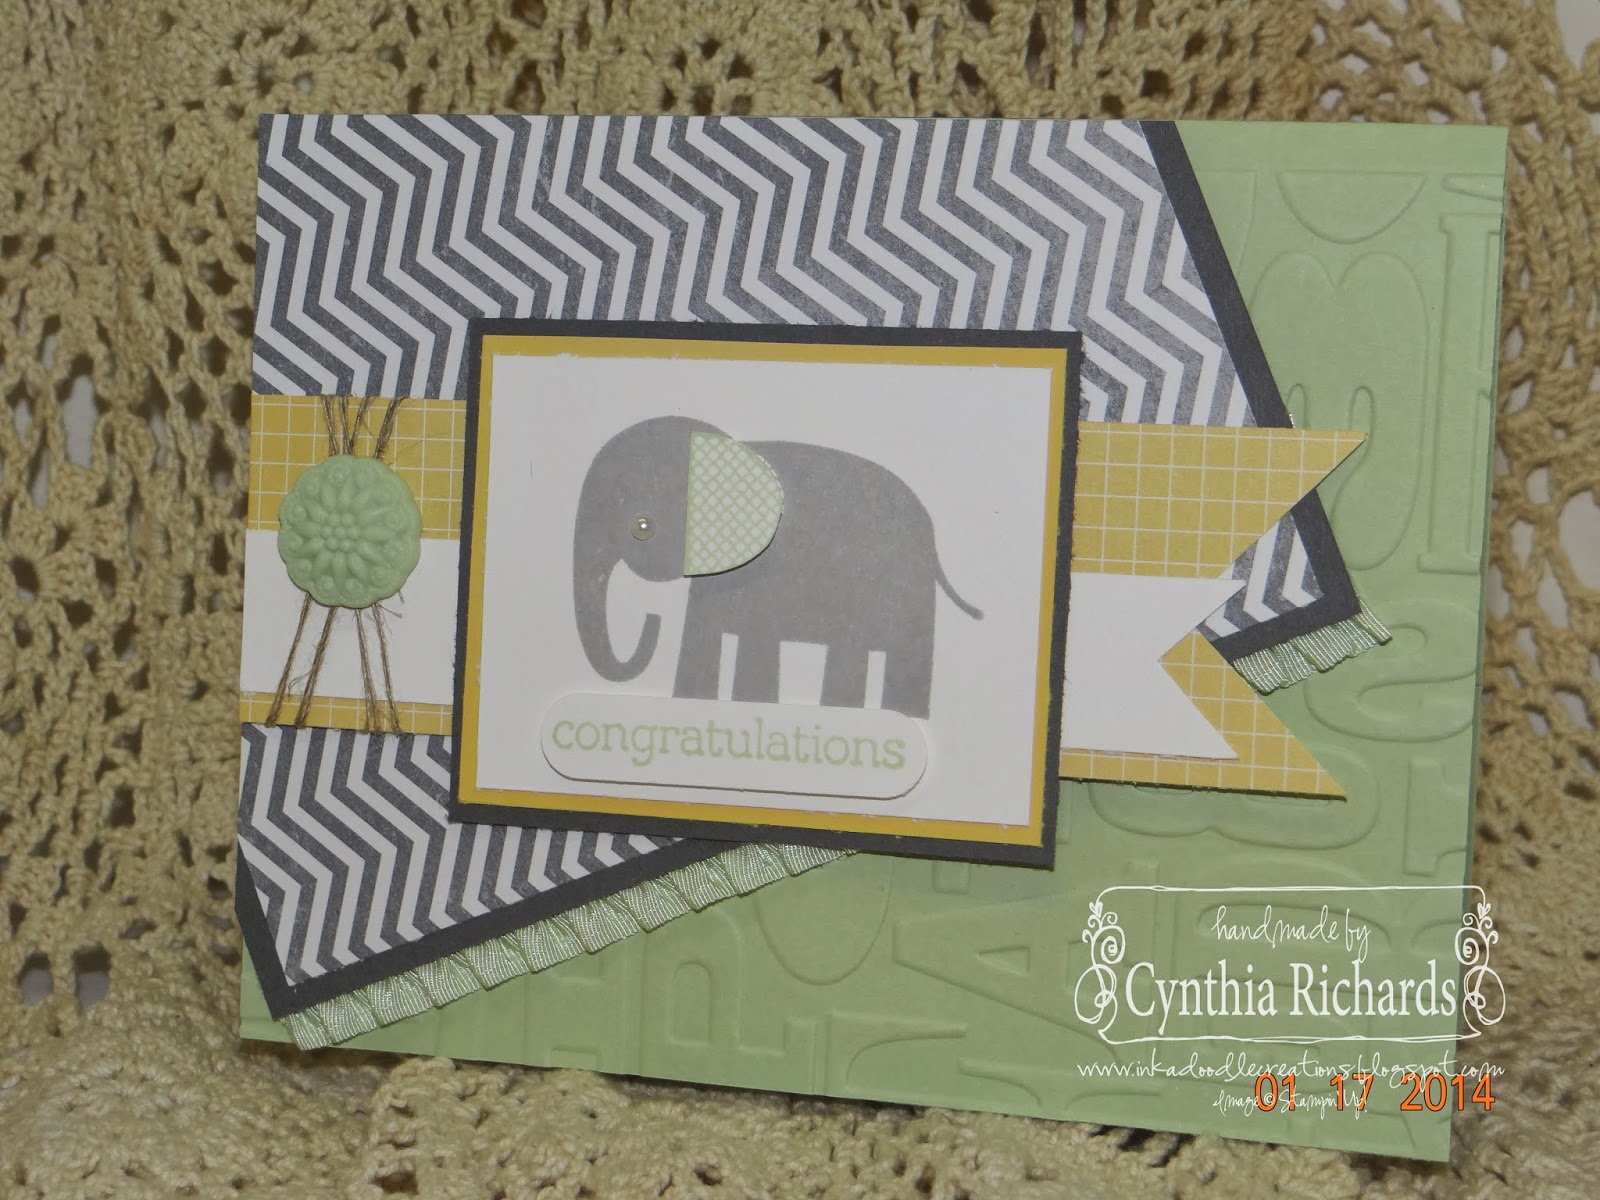
With my moving part, I chose to use one of the cute flowers from the "Simple Stems" stamp set and the DSP is "Sweet Sorbet", its one of the awesome items you can earn for FREE with a $50 purchase.  I stamped it twice and layered it with a foam dot.  I have never made a card with a moving part before, so I was excited to see this as one of my choices to participate with this month.  I used the penny spinner technique.  Picture instructions are listed below, just in case you are like me and you have never done this fun technique before.  I have it set, so that as you turn the card it will move from side to side.
 
step 1.  gather supplies of two pennies, punched shape that you want to move and foam dots.
step 2.  Place a foam dot in between the two pennies and place another on the outside.

step 3.  place the outside foam dot on the back side of the shape (in this case the flower)
step 4.  this is what it looks like all stuck together and placed inside the area you want it to slide on.  I used the word window punch on my card to create the area that my flower will slide across on.  Once penny rests on the outside and the other penny rests on the inside.  This is what holds it in place without falling off the card.
 

Thanks for joining me today.  Don't forget to leave some "love" and head over to SSInkspiraiton to check out the other creations from our design team members.  I hope you get INKspired to create!!

Card Supplies:
Stamp set:  simple stems with secret garden framelit set, perfectly penned
DSP:  sweet sorbet
Cardstock:  whisper white, pistachio pudding, basic black
Ink:  basic black, pistachio pudding and summer starfruit
Misc.:  pistachio ruffled ribbon, a penny, foam dots, word window punch, subtle candy dots

Friday, January 24, 2014

You're Lovely!!


Good morning bloggers and thanks for joining me here with Stylin' Stampin' Inkspiration! 

Today I am super excited to share with you two of my favorite items from the new Stampin' Up! Sale-A-Bration catalog.  What's that you say?  Sale-A-Bration is a special catalog that starts January 28th and runs thru March 31, 2014.  When you spend $50 in products from any current catalog, you can pick one item from this special catalog for FREE, yep I said FREE!!!

I created two different styled cards using the "You're Lovely" stamp set and the "Sweet Sorbet" DSP from the Sale-A-Bration catalog.  Both cards were super easy to put together and I did both in about 30 minutes.  One of the great things, is that the label with layers was created the same way for both cards.  With that being said, I have taken a couple of quick pics showing how I put together the label using some simple punches.  Hopefully you find it helpful to go create your own.

Quick Label Tutorial
(1) (2)
(1)  I stamped two, one in black and one in crisp cantaloupe.  Use the small Deco Label Framelit and cut out the black stamped "Lovely".  Use the 1-3/4" circle punch and cut out the center of the other.  Use a foam dot to place on top of the black piece. Punch out one black decorative label and one 1'3/4" circle and cut both in half like in photo #1.

(2) Add adhesive to each side like in photo #2.
(3)(4)
 (3)  Layer the stamped "Lovely" over each side of label punch.

(4)  Add adhesive to the circle halves as well, and place to the top bottom of the stamped "Lovely"
(5)

(5)  This is what it looks like when put together with all four pieces.

Card Supplies:
Stamp sets ~  SAB You're Lovely
Cardstock ~  pool party, crisp cantaloupe, whisper white and black
Ink ~  black pool party, crisp cantaloupe
DSP ~ SAB Sweet Sorbet
Misc. ~ deco label framelit set, neutral candy dots, distresser tool
Ribbon ~ black chevron ribbon
Punches ~ decorative label and 1-3/4" circle

Thanks again for joining me today!  Don't forget to leave some "love"and head over to Stylin' Stampin' Inkspiration to check out what the other design team members have to share!
 
I hope you get INKspired to go create!!


Monday, January 20, 2014

Peachy Keen Valentine with PP179 and FM143

Good morning bloggers!  Thanks for swinging by to check out my card creation for "The Paper Players" one layer valentine challenge and with "Friday Mash-Ups", color and theme challenge.  Wow, can't believe I was able to combined these two together to get this cute and simple card.


I used the cute color combo of coastal cabana, real red and crumb cake.  I also added hearts and arrows from the ever so awesome Peachy Keen stamp set.  Let me just say the the single stamped layer iwas really, really hard for me.  I am a layers girl with added bling and ribbon, but I made it with only one main layer and one little candy dot, haha!
I even stamped the inside to match the outside with no layers at all.


Thanks for stopping by.  I hope you have enjoyed my card with these two challenges.  Don't forget to leave some "love".

Supplies Used:
stamp set:  Peachy Keen
cardstock:  very vanilla
Ink:  coastal cabana, real red and crumb cake
Misc.:  distresser tool

Gingham Garden "Beauty"!!


http://www.ssinkspiration.blogspot.com/
 
Good morning and thanks for joining us here at SSINKspiraiton!  Today we are excited to share a new layout sketch.  This was such a fun sketch for me to put together using pictures of my flowers from last year.  I had bought a new camera and went to town taking snapshots and close-ups.


My word of choice is "Beauty" cause there is so much beauty that lies within each flower and petal!
 
Supplies:
Stamp set:  Secret Garden
Colors:  island indigo, daffodil delight, whisper white
DSP:  Gingham garden
Misc.:  gingham garden washi tape
 
As always thanks for stopping by.  Don't forget to leave some "love" and head over to SSINKspiration's main blog to see the other design team members fun take on this layout sketch!
 
I hope we have INKspired you to create with us!

Friday, January 17, 2014

Zoo Babies with FMS #119

Holy Moly, am I glad its FRIDAY!  It is Friday right?  Please someone pinch me, just to make sure I'm not dreaming!  Its been one of those weeks and I'm ready for the weekend. 

So here I am on a Friday night, sitting in McDonald's eating a late dinner and smooching off their free Wi-Fi!!  I will be so glad when we get Comcast next month at our home and I won't have to worry about running over or close to our max internet usage for the month.

Tonight's card is using the sketch over at Freshly Made Sketches. I decided to turn mine into a baby card using Zoo Babies.  I have only had this set for about two months and I had yet to use it.  I pulled it off the shelf and not only had I not stamped with it yet, but I hadn't even put it together!!  Geez, what is wrong with me?!

So anyway, here is the sketch and then my take on it.  I hope you enjoy!
 
 
Using the Zoo Babies set was so much fun.  I stamped the elephant in smoky slate then again in pistachio pudding.  I cut out his ear and layered it with a pop dot.  Added a small pearl for his eye and the cuteness is complete!
I kept the inside simple by just adding one of the corners that I cut off for the front layer.  I always like to recycle and reuse!
 
Card Supplies:
Stamp set:  Zoo Babies
Cardstock:  basic gray, pistachio pudding, whisper white, so saffron
Ink:  pistachio pudding
DSP:  I Am Me
Misc.:  pearls, alphabet press folder, word window punch, linen thread, in color boutique details
 
Thanks for stopping by and please don't forget to leave some "love"!
 
All these supplies and more can be purchased HERE!


A Retro Fresh Birthday!

http://www.ssinkspiration.blogspot.com/
 
Good morning bloggers and thanks for joining me with Stylin' Stampin' INKspiration!  Today we are sharing "Birthday" cards.  This card is one I made for one of my SSINK design team friends.  Hopefully she gets it before this blog post goes live.  If not, "Happy Birthday" Kathy Peck!!!


I was so excited about this card, that I almost didn't even send it.  That's awful I know!!  I have used 5 new items with this card...can you guess which 5 they are?  Check out the supply list at the end of this post to see which five they are!  One of the main reasons I love this card, is that it has banners in it.  Banners seem to be the thing that's in right now.  I know, I know, it doesn't take much to get me excited!!  You know its the little things that matter in life anyway!!


I always try to decorate the inside of my cards too.  Even though I don't always take a picture and show, but this is something I want to work on and show more of.  The inside should be just as nice as the outside, don't you agree?

Again, thanks for stopping by, leave me some "love" and don't forget to head over to the main blog for SSINKspiration to see the other design team members "birthday" creations.  I'm sure it will INKspire you to go create something too!

Card Supplies:
Stamp set:  simple stems(1), label love
Cardstock:  coastal cabana, very vanilla, tangerine tango, so saffron
Ink:  baked brown sugar
DSP:  retro fresh(2)
Ribbon:  gold sequin trim(3), gold bakers twine(4)
Misc.:  arrow embossing folder(5)

Don't forget that you can purchase any and all these supplies from HERE!

Thursday, January 16, 2014

Love and Sympathy with PPA188


Hello bloggers!  Thanks for stopping by to check out my creation for the card sketch over at Pals Paper Arts.  They have come up with a really nice and simple sketch.  I am in need of some sympathy cards but wanted to cheer it up a little with a flower and not just any flower but a flower made from ribbon to add a nice 3-d touch to the front of the card.
PPA188-Sketch
I used crushed curry chevron ribbon to make my flower.  I also added two burlap ribbon banner tails.  Now this may not want to be a card you try to mail, but its a lovely card to be hand delivered to a special friend.

I kept the inside simple with cutting out a patterned strip from the Afternoon Picnic DSP.

Thanks for stopping by.  I hope you have enjoyed my card.  Leave some "love" as I always enjoy reading your thoughts!

Card Supplies:
Stamp set:  Love and Sympathy
DSP:  Afternoon Picnic
paper:  very vanilla, wisteria wonder, coastal cabana
Misc.:  burlap ribbon, crushed curry chevron ribbon, in color boutique details, scalloped trim border punch

All of these supplies and more can be purchased HERE!

Wednesday, January 15, 2014

Monochromatic Valentine!

http://www.ssinkspiration.blogspot.com/

Good morning bloggers and thanks for joining me for a little monochromatic fun with SSINKspiration!  What the heck is mono..romat.. what, you say?!  I know right, I still don't know even how to say the word, but found out after a little further investigation just what it ment.  I came across Kerry's blog - stampgoodness, and she had some color samples already put together.  Hey don't laugh, I'm still a newby at certain crafty things!!  Here is what monochromatic means, just in case you are like me.......

mon-o-chro-mat-ic:
1.)  containing or using only one color.
2)  (of light or other radiation) of a single wavelength or frequency.

While on her blog, I came across a sketch layout that was perfect for this color scheme challenge.  Below is the sketch.  Click her link above to check out her monochromatic schemes she has put together.  I chose to work with the oranges.

and here is my take on the sketch and monochromatic colors of orange.  I chose to work with Cajun craze, tangerine tango and pumpkin cause this card is for my youngest son for valentines day.  His favorite color is orange.  I plan to make another in blues for my oldest son!

I added some splashed Cajun craze from the Gorgeous Grunge stamp set and added two patterned hearts from the Hearts a Flutter stamp set.  I also added a set of four mini banners, cause hey, its not a card now on my blog that doesn't have one lately.  I am sooo in lo-ve with banners!!

I also created a heart layer with banners of course for the inside.  I'll hand write a little sweet heat note for my son later!

Now that you have seen my creation, head on over to the SSINKspiration's main blog page, (but not before leaving some love) and check out what the other design team members have created!
We all hope we have INKspired you to go create too!

Card Supplies:
stamp sets:  hearts a flutter, yippee-skippee, gorgeous grunge
cardstock:  Cajun craze, tangerine tango, pumpkin pie, crumb cake and very vanilla
Misc.:  neutral candy dots and 1-1/4" square punch

You can purchase any and all of these supplies HERE!

Tuesday, January 14, 2014

Be Mine Colors with HSS #177

Thought I would post the card I just created for the color challenge over at Hand Stamped Sentiments.  After getting dishes done and straightened up the kitchen, I had time to squeeze in one more card befor the days end.  After this, its my nightly cup of coffee while enjoying an episode of "Everybody Loves Raymond"!  Yep, I'm a huge fan!!


Of course when I saw the colors, I immediately thought of Valentines Day and what better set to use than "Hearts a Flutter".  Its great for hearts and banners.  What!?  Did I say "banners", yep you heard (well read) right.  I added banners to the bottom of my card.  I found this great sketch on pinterest and decided to use it for this card.
Deconstructed Sketch No. 94
Card Supplies:
Stamp Sets:  hearts a flutter and a round array
Ink:  Wisteria wonder, coastal cabana, whisper white
Cardstock:  Wisteria wonder, coastal cabana, whisper white, black and strawberry slush
Misc.:  modern mosaic folder, hearts a flutter framelit set, white 1/4" stitched grosgrain ribbon
Punches:  7/8" and 1-1/4" scalloped circles, 1" circle punch
DSP:  quatrefancy specialty
 

Monday, January 13, 2014

Card Sketch with SSInkspiration

http://www.ssinkspiration.blogspot.com/
Good morning bloggers!  I want to share with you my card using our sketch this week over at Stylin' Stampin' Inkspiration.  Click the header above to come on over and join us this week for our challenge.  We are always interested in seeing everyones projects! 
Here is our card sketch for this month!
A great simple sketch, but yet the door is open to do so much with it!


And this is my take on it!  I needed to create a card for a upcoming Birthday and wanted to make it simple but fun!  I like how I created the wave of small banners using the new DSP "Retro Fresh" under the sentiment banner.  To get the rope looked ribbon at the bottom, I tore apart a piece of burlap ribbon and tied to together in sections.  
 
I hope you enjoyed my creation and decide to create one of your own.  Don't forget to leave me some "love" and head over to our main blog site to take a peak at our other design team members projects  I hope we will INKspire you to create with us!
Supplies Used:
Stamp Sets:  express yourself
Cardstock:  baked brown sugar, very vanilla and so saffrom
DSP:  retro fresh
Ink:  baked brown sugar
Misc.:  chevron folder, bitty banners framelits, brights candy dots
Ribbon:  burlap ribbon and natural chevron ribbon 

Thursday, January 9, 2014

Golden Sparkle Valentine with Stylin' Stampin' Squad January Blog Hop!


http://www.ssinkspiration.blogspot.com/

Thank you so much for joining us for our January Stylin' Stampin' Squad Blog Hop!  Love is in the air and our talented group of design team members have a Whole Lotta Love Goin' On as we are excited to be sharing some NEW Occasions Catalog goodies and some Valentine's Day projects with you this month!

You should have just left stop number #1 on the Stylin’ Stampin’ Squad  blog hop – Anastasia R. with Stampin Blondie. If so, you are in the right spot. If a link doesn’t work or you get off track, you will find  the full blog hop lineup below.

As you hop along, please be sure to comment and show some love on every blog!  We are always excited to hear from our followers! 

I am happy to share with you two valentines day projects!  I created both using the Watercolor Wonder washi tape from the new Spring Mini Catalog.  Washi tape is so fun and easy to use, its just crazy with all the things I've done with it.  It's become one of my must have items in my craft room.
You can't give a card without a little treat box filled with chocolates on Valentines Day!

 The card was created using the heart framelit set.  I cut out a large heart in the middle and a small one on each side.  I used the washi tape to place behind each heart,  embossed the top layer using the new Arrow embossing folder and placed foam dots at each corner to raise it up.  I also sprayed the front of card using smooched spritz to add a little shine.  For a sparkle touch, I added some single gold sequences.
The cute little box is perfect for a handful of Hershey kisses or in my case, four chocolate truffles!  Yummy...Yummy!!

I hope you have enjoyed both my valentines day projects.  Head on over to stop #3 Dawn S. of Dawn's Creative Chalet and see what she has created!  As always, please don't forget to leave comments for each of us design team members!
http://dawnscreativechalet.com/2014/01/ssbhjanuary2014.html">Dawn's Creative Chalet


Supplies Used
(all items with an item number are new items from the Spring Mini Catalog)
Cardstock:  very vanilla
Misc.:  Watercolor wonder washi tape #133000, gold twine #132975, gold sequin trim #132983, foam dots, arrow embossing folder #132187 and hearts framelits set

Blog Hop Participants:
1.Anastasia R. of Stampin' Blondie
2.Cynthia R. of Ink-a-Doodle Creations
3.Dawn S. of Dawn's Creative Chalet
4.Kathy P of Katrina P's Creative Corner
5.Pamela W. of Stinky Tofu
6.Diana E. of Stampin' Fun with Diana
7.Darla R. & Nancy K. of Stampin With Darla and Sisters
8.Jamie H. of Unique Ink
9.Rose C. of Stamp with Rose
10.Kim R. of Stamping with Kim
11.Darcy J. of DJ's Stampin' Place
12.Bree R. of Craft-Somnia
13.Kristina M. of Mama's Sanity
14.Annie L. of Love Me Cards
15.Jennifer B. of NW Stamper
16.Tonya B. of Stampin' with Tonya
17.Heidi B. of Stuck on Stampin'